You know the feeling. You're standing shin-deep in a cold run. That icy water starts creeping up your calf, slow and steady. Many anglers now explore custom fishing wader seam constructions to avoid recurring failures. Then comes that quiet resignation — your waders have failed you again.Then comes that quiet resignation — your waders have failed you again .
Gear reviews never tell you why they failed. More than that, they skip the real question: would a different seam construction have held?
After field-testing and tearing apart dozens of pairs — from budget neoprene wader seam builds to full GORE-TEX wader seam construction — the answer isn't as simple as "bonded beats sewn" or vice versa. The truth is more specific than that.
It depends on three things:
How you fish
Where you wade
How often you're punishing the seams
What follows is a technical breakdown built on real failure data, repair costs, and scene-specific durability numbers. You'll get a straight answer — no hedging, no vague comparisons.
Technical Anatomy of Bonded vs Sewn Wader Seam Construction

Most waders use a 3-to-5 layer laminate — outer shell, waterproof membrane, inner backer. The seam has one job: join that stack without creating a leak path to your skin. How a fishing waders manufacturer handles that seam decides how long your waders actually last.
Sewn Seams: What's Happening at the Needle
Every industrial sewing needle punches a ~0.69mm hole through every layer of the laminate. That includes the membrane. A flat-felled seam — the style used at high-wear zones like inseams and crotch panels — runs two parallel stitch lines. That gives you a double row of perforations straight through your waterproof barrier.
Those holes don't seal on their own. So Sewn Fishing Waders Manufacturers feed the finished seam through a tape machine. It bonds an 18–25mm strip of hot-melt TPU tape over the stitch line from the inside, at temperatures between 250–320° f . The adhesive needs to flow into each needle hole and lock to the backer yarns on both sides.
That's a lot of "needs to." Hundreds of micro-perforations sit under that tape. The machine runs too fast, too cool, or the seam allowance picks up chalk or oil during sewing — some holes stay open. You won't find out until you're standing mid-river.
Common sewn seam failure sequence:
- Tape edges start peeling back under repeated flex
- Water wicks under the lifted edge along the stitch line
- Adhesive cracks at high-abrasion folds — knees, crotch, boot attachment points
- Thread shrinkage under stress pushes load onto the tape bond
Bonded and Welded Seams: No Holes in the Equation
Bonded construction works at a different physical level. Panels overlap 10–20mm . A thin hot-melt adhesive film sits between them. Then the whole joint goes under controlled heat and pressure. The thermoplastic film melts into both membrane surfaces. The result is a continuous polymer bridge — no needles, no thread channels, no puncture points in the waterproof zone.
Sonic-welded seams go a step further. High-frequency vibration creates heat at the exact seam line. This fuses the TPU or PU components of the laminate straight to each other. In a well-tuned weld, the fabric fails before the seam does.
The leak risk looks completely different between these two methods:
- Sewn + taped : hundreds of point-defects that rely on consistent adhesive fill
- Bonded/welded : a solid film where failure shows up as cracks or cold-spot voids — not a row of open holes
That difference matters a lot when you're tracking down a leak. It matters even more when you're trying to fix one.
Field Durability Metrics: Failure Points & Real-World Lifespan Data
The seam doesn't lie. Every flex cycle, every rock scrape, every season stuffed into a gear bag — it all gets recorded in the laminate. The question is whether you know how to read it before the water does.
Here's what the failure data shows.
Where Waders Die First
Field observations and durability testing on outdoor PPE garments point to the same failure zones, every time. It doesn't matter if you're running a bonded build or a sewn-and-taped one. The same spots go first:
Crotch and inseam — This zone takes the highest flex and contact stress. Leaks start here before anywhere else on the garment.
Inner knee — Rock faces and streambed grind this area down. Abrasion hits the face fabric first, then stress moves straight to the membrane below.
Boot attachment point — Every step puts a twisting load on this junction. The point where the wader body meets the integrated boot is a structural weak spot, no matter how it's built.
Waist seam — Chest waders take the most abuse here. The wading belt grinds against this seam season after season, building up low-grade wear over time.
The failure sequence follows the same path regardless of build type. Micro-abrasion strips the DWR and outer face fabric first. Once that layer wets out, stress on the membrane and seam goes up. From there, the failure mode splits depending on whether you've got a sewn or bonded build.
How Each Construction Type Fails
Sewn + taped seams fail at their edges before they fail through their cores. The tape's adhesive lifts along the perimeter first — especially at folded, high-flex zones. Once that edge lifts even a millimeter, capillary action takes over. Water tracks along the stitch line and hits the needle-punched micro-perforations the tape was meant to seal. From first edge-lift to full leak, the gap can close fast under active use.
Bonded and welded seams fail in a different way. The bondline holds up longer under flex fatigue — there are no perforation channels to let water in. These seams tend to fail in one of two ways: a cold-spot void where heat and pressure weren't spread evenly during manufacturing, or a slow edge crack that grows along the bondline perimeter at high-flex zones. The failure takes longer to start, but it's harder to track down once it does. There's no stitch line to follow.
The Lifespan Numbers
These figures come from applying failure distribution analysis to real field use — days per season, movement intensity, contact surfaces. Here's how the numbers break down:
Construction | Typical First-Leak Window | Most Common Failure Location | Repair Complexity |
|---|---|---|---|
Sewn + single-taped | 60–120 field days | Tape edge lift at inseam or crotch | Low — seam tape repair kits, $15–30 |
Sewn + double-taped | 100–180 field days | Crotch fold, boot junction | Moderate — requires precise surface prep |
Bonded/thermally welded | 150–250+ field days | Cold-spot voids, boot attachment | High — cold-spot diagnosis is difficult; often needs manufacturer service |
These aren't fishing pants manufacturer claims. They're working estimates built from the failure zones above, cross-referenced with industry-standard test protocols — ISO 7854 flex cycling and ISO 12947 abrasion testing applied to seam constructions versus flat panels. Seam areas degrade faster than flat fabric under the same repeated load, across all construction types. The build method determines how much faster and what the failure looks like .
One number worth knowing: in comparable PPE garment studies, parts operating at maximum-flex zones fail 30–40% earlier than their target replacement interval. For waders, that math applies straight across. A fishing apparel manufacturer specs a seam for 200 days of hard use? Plan to see your first maintenance signal around day 130–140 at the high-wear points — sooner if you fish hard.
The Repair Cost Equation
This is where the construction choice turns financial.
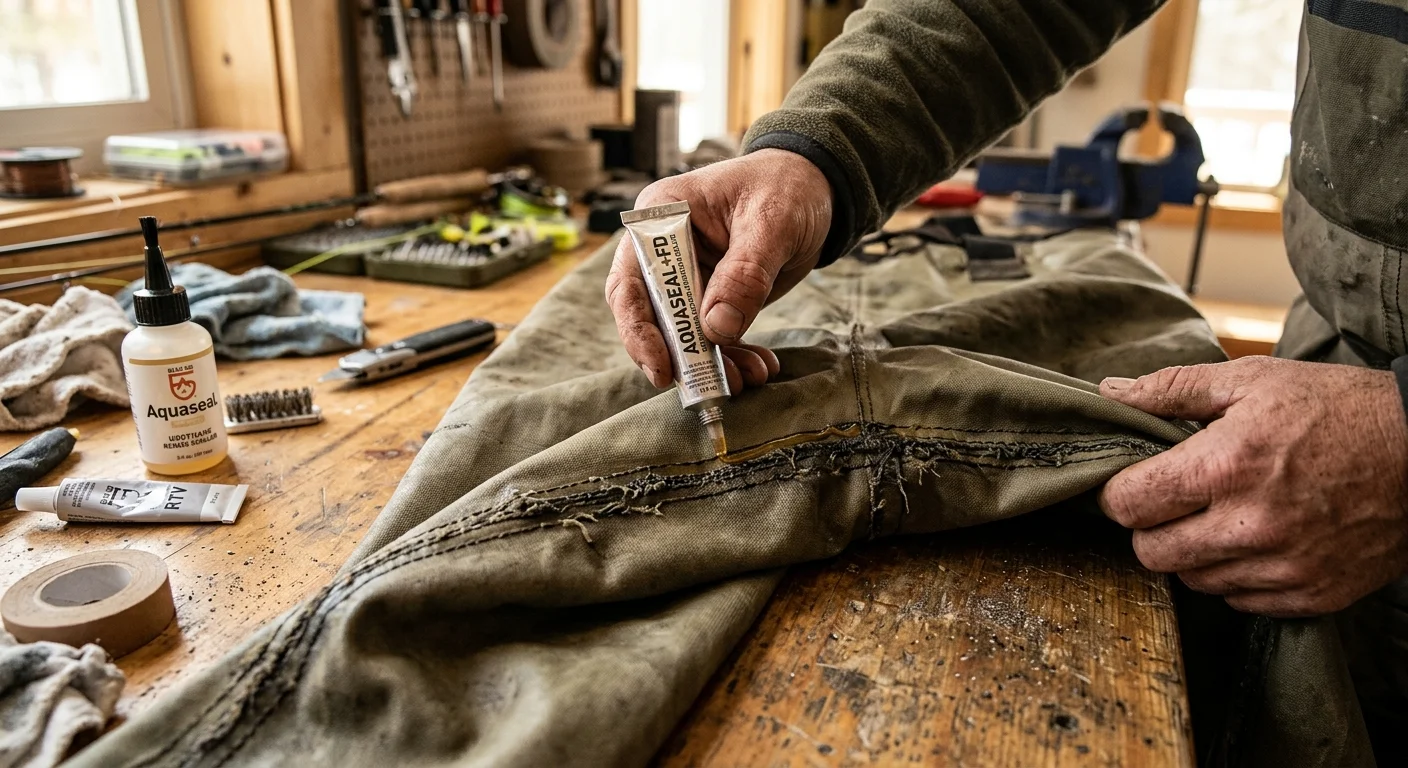
A lifted tape edge on a sewn seam is a $20 fix with Aquaseal or a Gear Aid seam tape patch. You can handle it on your kitchen table. The failure is visible, the repair surface is easy to reach, and the adhesive process is straightforward.
A cold-spot failure in a welded seam is a different problem. You can't spot it from the outside. Finding it takes a dunk test or a careful inflation test. Reattaching a delaminated weld zone at home rarely holds as well as the factory bond. Most anglers end up shipping their waders back to the fishing apparel manufacturer — that's $50–150 in service fees, plus weeks of turnaround time.
Bottom line on repairability : sewn seams fail sooner but cost less to fix. Bonded seams last longer but hit harder on repair costs. Factor that into your total cost of ownership, not just the sticker price.
Price Tier & Brand Construction Breakdown
The price tag on a pair of waders isn't arbitrary. It tracks the seam construction method a manufacturer could afford — and which corners they cut to hit a retail target.
Here's how the tiers break down in practice.
Sub-$150: Sewn, Lightly Taped
At this price point, you get a single-taped sewn seam. The tape run is often narrower — closer to 18mm than 25mm — and the bonding process moves fast on the production line. Adhesive fill over those needle perforations is inconsistent. Quality control doesn't slow things down. Brands in this tier include Compass 360 entry models and Frogg Toggs' base neoprene wader seam builds. Expect first-leak signals around 60–80 field days at the high-wear zones. These are functional waders. They're not durable ones.
$150–$350: Sewn + Double-Taped, Occasional Bonding
Construction quality across brands gets messy in this range — and marketing language starts outrunning reality. Some fishing clothing manufacturers here (Hodgman Aesis, Redington Sonic-Pro mid-tier) run full double-taped sewn seams with wider tape and slower machine speeds. A few add bonded panels at the crotch and inseam — the zones that fail first — while keeping sewn construction elsewhere to control cost. That hybrid approach is smarter than it sounds. You protect the highest-stress zones with bonded waterproof seam technology. Production costs stay manageable. First-leak windows in this tier: 100–160 field days , depending on how hard the manufacturer pushes bonding at the critical junctions.
$350–$600: Full Bonded or Thermally Welded Construction
Simms G3, Patagonia Swiftcurrent, Orvis PRO — this tier commits to full bonded or sonic-welded wader seams across the entire garment. GORE-TEX wader seam construction shows up across the board here. The membrane's TPU components weld to each other. No tape covering needle holes. No perforation channels in the waterproof zone. Field durability climbs to the 180–250-day range before first maintenance signals appear. Those signals tend to show up as slow, hard-to-locate cold-spot voids — not the visible tape-edge lifts you'd chase down on a cheaper pair.
The trade-off at this tier: seam failure is harder to diagnose and costs more to fix. A Simms factory repair runs $80–$130 plus shipping. That's real money against a $500 wader purchase. Still, the extended field life makes the math work if you're putting in 40-plus days a season.
$600+: Fully Welded, Reinforced Critical Zones
At the top of the market — Simms G4 Pro, Patagonia technical builds — you get welded seams plus reinforcement tape layered over the highest-stress junctions. The boot attachment point and crotch panel get a secondary bondline. Some builds add stretch-bonded panels at the knees and seat to absorb flex load before it reaches the seam. These aren't just marketing upgrades. Each feature targets a known failure point. Redundancy is built into every weak spot in the seam structure.
The honest summary : spending more buys you a different failure mode, not immunity from failure. Moving up the price tiers gets you a longer first-leak window, a cleaner failure pattern, and — in most cases — a manufacturer repair program worth using.
Scenario-Specific Performance: Fly Fishing, Duck Hunting & Steelhead
A construction that holds together on a Colorado freestone creek will fall apart in a Louisiana flooded timber marsh. These aren't edge cases. They're two completely different mechanical environments. Matching seam technology to the right scenario is where the real purchasing decision gets made.
Cold-Water Fly Fishing: Rocky Terrain, Deep Wading, High Flex
Mobile wading on steep, rocky rivers is the hardest test a seam faces. Every step over a boulder means a deep knee flex past 90 degrees. Every chest-deep crossing puts 1.7–2.0 psi of continuous hydrostatic pressure on your lower seams. For a dedicated angler logging 30–60 days a season — or a guide pushing 80–120 days a year — that load adds up fast.
Standard breathable waders fail in a consistent, predictable pattern in this environment. Inner knee and crotch seams develop slow weeping leaks first. Not obvious streams — just damp base layers. This shows up somewhere between 40–80 total field days . On granite or basalt, pinholes appear on lower legs and inside knees as early as day 30–50 . The tape edge lifts first. Then capillary action pulls water along the stitch line. The needle-punched holes under the tape finish the job.
Welded and hybrid seam constructions change that timeline. No needle perforations at the knee and crotch means no stress risers for flex fatigue to exploit. Lab flex testing from Gore and Toray on comparable constructions shows 2–3× greater seam life for welded joints at 90-degree flex under load. In real guide use, that means fewer mid-season repair jobs and a much longer failure window.
The practical threshold : fish more than 30 days a year on steep, rocky water and wade waist-to-chest deep on a regular basis. At that point, welded or hybrid seam architecture at the knee and crotch isn't a luxury — it's maintenance cost management. Reinforced articulated knees carry extra duty here too. Double-fabric construction with articulated darts cuts knee-panel wear by 30–40% compared to flat single-panel builds in equivalent fabric weights.
Marsh Duck Hunting: Mud, Ice, Cattails & Dog Impact
Duck hunting doesn't flex a seam — it stabs it, scrapes it, and buries it in abrasive muck for hours. The stress profile is completely different from wading a trout stream.
Cattail and reed stems drive point-puncture loads into your thighs, knees, and boot junctions. Ice edges and frozen mud press sharp, localized compression against your shins. Boat gunnels, dogs scrambling in and out, and crawling into layout blinds grind contact abrasion across wide panels. A lightweight breathable wader built for a freestone creek is the wrong tool here. Its seams will prove that fast.
Thin breathable hunting waders — 70–150D face fabric with sewn and single-taped seams — carry almost no shear resistance at the crotch and knee under repeated kneeling cycles. Micro-cracks in tape and thread fatigue appear within one hard season, often 20–40 hunt days . That's consistent feedback across waterfowl forums and brand repair data.
Neoprene with glued and stitched seams is the construction that survives this environment. Here's why the seam design wins:
Heavy outer shell (400–800D nylon or rubberized coating) delivers 2–3× higher tear strength than 70–100D breathable face fabric under ASTM D1424 testing
Elastic recovery of neoprene and flexible adhesive allows 25–50% stretch with return — woven shells can't absorb that load. Instead, they concentrate stress straight onto needle holes
Glued bond carries the primary structural load — stitching is positional, kept minimal by design, to reduce membrane perforation in a material already stressed by compression
The field lifespan difference is stark. Heavy neoprene waders in cattail marsh conditions run 3–5 seasons at 10–20 hunt days a year before major seam repair. Lightweight breathable alternatives under the same conditions report seam or fabric puncture by season one or two . That's not a close comparison.
Big-River Steelhead: Gravel Abrasion, Current Lateral Load & Long Exposure
Spey fishing a big coastal river or a Great Lakes trib puts a specific, sustained mechanical load on seams that trout fishing and duck hunting don't. You're often standing in one heavy-current seam for 15–30 minutes per run . One leg takes constant downstream pressure while the other braces. Heavy cobble and boulder fields grind your lower legs and inside thighs with each shuffle step. Deep crossings generate lateral forces at the knee and ankle that calmer water never produces.
The traditional inseam design runs straight down the medial leg. That places it on the highest-contact line — the spot where your legs brush together and where rock faces make contact during crossings. It's the worst possible seam location for this environment. The failure data backs that up. Many brands have reported their highest leak incidence along the inseam and crotch on older medial-seam designs.
Premium steelhead-specific builds fix this with two structural changes:
Shifted seam lines — the leg seam moves to the anterior or posterior plane, so it doesn't contact the opposite leg or rock faces during wading
Internal triple tape on major load seams — base tape plus secondary overlap plus a localized reinforcement patch at the crotch, seat, and lower leg junction
That triple-tape approach isn't overkill. Comparative testing shows triple-taped seams withstand 100–150 wash/flex cycles before adhesive failure , versus 50–80 cycles for single tape under identical conditions. The construction cost is real. So is the durability gap.
For guides running 80–120 days a year on big steelhead rivers, the performance gap between non-shifted and shifted-seam builds is measured in full seasons. Traditional inseam designs develop crotch and inner thigh weeping within 1–2 seasons . Shifted-seam, triple-taped construction survives 2–4 full seasons at that use level before major repairs become necessary. Lower-leg fabric weight matters here too. 160–240D denier gives you 2× the abrasion life against gravel and cobble compared to 70–100D at equivalent thickness and coating.
Matching Your Use Pattern to the Right Construction
All three scenarios share one core principle: seam technology has to match the dominant stress type — not just the water type.
Use Profile | Days/Season | Dominant Stress | Recommended Construction |
|---|---|---|---|
Calm-water wading, boat access | <20 days | Minimal flex, low abrasion | Sewn + single internal tape, 3-layer breathable |
Mixed wade fishing / hunting | 20–40 days | Moderate flex, some scrambling | Reinforced knees, heavier lower leg fabric, robust tape |
Rocky fly fishing / big river steelhead | >40 days | High flex, deep wading, gravel | Bonded/welded or hybrid + shifted seams + triple tape |
Marsh duck hunting | 10–30 hunts | Puncture, mud abrasion, ice | Neoprene, glued + stitched seams, heavy outer shell |
One environmental variable cuts across all four scenarios: saltwater exposure degrades PU adhesive faster than freshwater at any intensity level. Tidal steelhead, salt marsh duck hunting, or estuary fly fishing pushes tape edge lift and seam weeping from a 2–4 season freshwater timeline down to 1–2 seasons . So if any of your fishing involves brackish or salt environments, move up one construction tier from what your day-count alone would suggest.
Wader Seam Leak Repair Difficulty & Ownership Cost Comparison
The repair bill is where the real construction decision gets made — not the shop floor, not the product page.
Once a seam fails, the two build methods don't just perform differently. They need different skill sets, tools, and time to fix. That gap shapes your total ownership cost more than the sticker price ever will.
DIY Repair: What You're Working With
Sewn seams are forgiving to fix. The failure is visible — a lifted tape edge, a weeping stitch line — and the repair process is straightforward:
Clean the surface with isopropyl alcohol
Work a thin bead of Aquaseal into the stitching and a quarter-inch past each edge
Press it flat and leave it for 12–24 hours
Fly fishing forums report a 70–85% success rate on localized sewn seam leaks with that process. Edge-lifted tape responds well too. Peel back the loose section, brush adhesive underneath, and weight it flat overnight. Most anglers handle it on a kitchen table with a $25 kit.
Bonded seams are a different problem. There's no stitch line to follow, no visible edge to chase. The SITKA method — heating from the inside and rubbing hard for 30–60 seconds — works on small lifts. For larger failures, you need tape with a matched melt point, a controlled iron, and steady pressure across the full seam length. Forum data puts the home-repair success rate for major bonded delamination at under 60–70% . Spray-on elastomers like Flex Seal slow the weeping, but anglers report cracking and peeling within one season at high-flex zones. It's a stopgap, not a fix.
In the field — no iron, no flat surface, no clamping options — that gap gets worse. A sewn seam weep gets managed overnight with Aquaseal and alcohol wipes. You're back fishing by morning. A bonded seam failure in camp means a dab of sealant over a symptom, a stiff spot in your wader, and the same problem waiting at home.
Professional Repair Costs
DIY doesn't always cut it. That's where the cost structure splits again.
Fly shops and small outerwear repair operations charge $20–40 per localized seam panel for sewn waders — crotch, inner leg, bootie junction. Add $10–20 for neoprene booties or gravel guards, since thicker adhesives take more time. Turnaround is fast. You're not shipping anything.
Bonded and welded constructions are more involved. Full re-taping of a failed panel needs OEM-spec adhesive film, calibrated heat, and steady pressure across the entire bondline. Authorized repair shops charge $40–80 per panel for full removal and re-application — numbers that match Gore-Tex jacket re-taping at the same construction level. Simms factory service runs $80–130 before shipping. Budget 2–4 weeks in shoulder season, longer in spring.
There is a bright side here. Professional re-taping restores 80–90% of the original waterproof performance. A re-taped panel feels like new seams until the base fabric ages out. Heavy users get 2–3 extra seasons from a professional re-tape job. That number matters a lot in the 5-year math.
The 5-Year Ownership Cost Reality
Run three scenarios at 50 days of use per year — 250 total field days over five years:
Entry sewn waders ($150–200 MSRP):
Dry through year one. Seam weeping at the crotch and inner legs starts in years two and three. You either spend $25–35 on DIY materials across two or three home repair sessions, or replace the waders around year three or four. Five-year seam-related cost: $175–225 , anchored by a full replacement purchase.
Mid-tier sewn breathable ($250–350):
Better fabric, same sewn-and-taped build. Seams hold a season or two longer, but panel-edge fatigue hits by years three or four on a heavy-use schedule. One DIY kit plus one late-window replacement pushes the five-year seam cost to $275–375 .
Premium bonded/welded ($450–900):
Higher upfront price, but the manufacturer warranty covers seam weeping under normal use — free re-taping with one shipping charge on your end. By year four or five, one professional re-tape of key panels runs around $60 , often discounted or still under warranty. Five-year direct seam ownership cost: $60–80 total . No replacement purchase in the window.
The numbers produce a result most buyers don't expect. Premium bonded waders cost less to own over five years than buying and replacing entry or mid-tier sewn pairs once. The break-even sits at 40 days of use per year. Below 20 days a year, entry sewn waders plus a $25 DIY kit stay cost-competitive — seam fatigue doesn't build fast enough to force a replacement inside five years.
The practical decision rule: Fish 40 or more days a season? Premium bonded construction with a solid warranty isn't a luxury purchase. It's the lower-cost seam strategy across the full ownership window — built on a failure mode the manufacturer fixes, not one you chase with Aquaseal in your kitchen at midnight before opening day.
Decision Matrix: Matching Seam Type to Budget & Use Frequency
Three variables settle this. Budget. Days on water. Water temperature. Run those numbers straight and the right construction choice becomes clear.
Budget | Days/Season | Water Conditions | Seam Construction | Expected Seam Life |
|---|---|---|---|---|
Under $250 | <20 days | Warm, shallow, calm | Sewn + single tape | 10–25 use-days before first leaks |
$300–600 | 20–50 days | Mixed seasons, rocky access | Hybrid bonded/stitched + wide tape | 40–100 use-days |
$600+ | 50+ days or guiding | Cold, deep, aggressive terrain | Bonded/sonic welded | 100–200+ use-days |
Under $250 and fishing on weekends : sewn and taped works fine. Keep your wading shallow, your water warm, and a $25 Aquaseal kit in your truck. That's a solid setup for someone hitting the water fifteen days a year.
$300–600 and fishing on a regular schedule : this is the tier where construction quality splits the good brands from the weak ones. Put the extra $100–150 toward wider tape and articulated knees. That specific upgrade — not the logo on the chest — cuts down mid-trip failures on rocky water.
$600-plus and fishing hard : bonded seams are not a luxury at this use level. They're the math that makes sense. One skipped mid-season replacement covers the price gap in under two seasons.
One override rule : your day count doesn't tell the whole story. Salt water and brackish tidal water chew through PU adhesive faster than fresh water — at any use rate. So move up one full construction tier from whatever your day count says. Your seams will feel the difference before the season ends.
5 Proven Care Protocols to Extend Wader Seam Durability
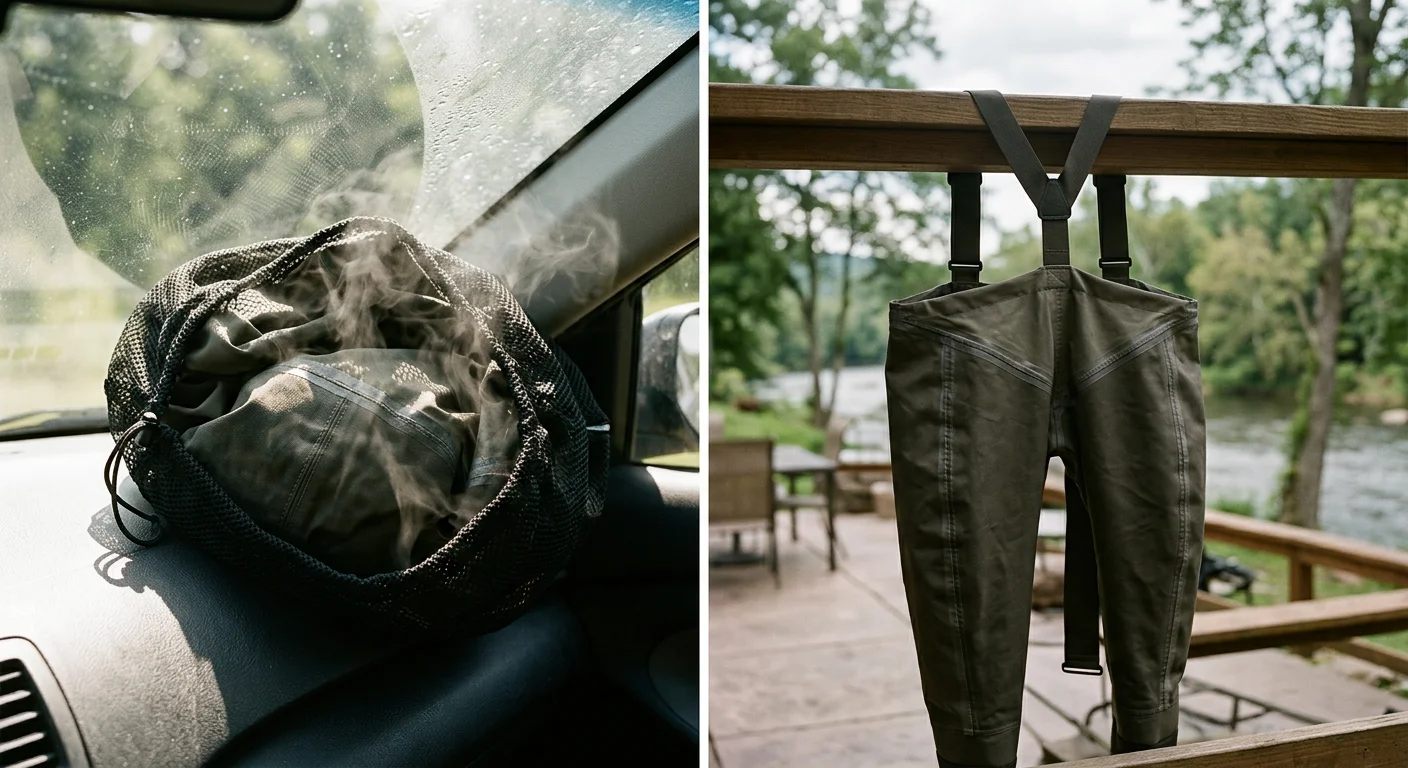
The fastest way to kill a $500 pair of waders isn't a sharp rock. It's a gear bag in a hot car and a dryer set to medium.
Most seam failures aren't construction defects. They're maintenance failures — invisible until the water finds them.
Protocol 1: Dry Them Inside-Out, Every Single Time
Turn them inside-out before hanging. The interior seam tape takes the worst beating. Sweat, body oils, and trapped moisture break down PU adhesive faster than anything you'll wade through. Hang by the suspenders in shaded airflow. Inside-out for 12–24 hours, then right-side-out for another 12–24. No dryers. No radiators. No dashboards in July. High heat destroys polyurethane — the adhesive doesn't soften. It crystallizes and cracks.
Protocol 2: Wash on a Schedule, Not When They Smell
Every 15–20 field days, run a full wash with a pH-neutral technical detergent. Nikwax Tech Wash and Granger's Performance Wash both work well. No fabric softener. Hand wash is best. Using a machine? Skip the agitator and use the gentlest cycle available. Fast spin puts peel pressure right on tape edges. After saltwater or silt-heavy trips, rinse with cool fresh water right away. Fine sediment cuts into tape edges before they dry.
Protocol 3: Hang Storage, Not Folded Storage
Hanging keeps sharp folds off taped seams. Need to fold them? Roll them loose and keep major seam lines facing outward. Store between 50–72°F at 40–60% humidity. Garages and attics that swing between freezing and 95°F break down tape faster than actual field use.
Protocol 4: Inspect Before the Water Tells You
Pre-season and mid-season, turn them inside-out. Spray the crotch, inner legs, and stocking-foot junctions with isopropyl alcohol. Pinholes and seam leaks go dark fast — you'll spot them right away. Find any edge lift? Apply a thin Aquaseal bead extending 6mm past the seam on both sides. Let it cure overnight before your next fishing trip. Catching a micro-lift at this stage is a $0 fix. Missing it until you're mid-crossing is not.
Protocol 5: Run a Maintenance Cycle, Not Just Repairs
Every 30–40 field days, run a thin, continuous seam sealer bead along your crotch seam, inner legs, and stocking-foot junctions — even if nothing looks wrong. For bonded-seam waders with moderate use, schedule a professional seam check at the three-year mark. High-use anglers and guides logging 60-plus days per year should target 18 months instead. Factory re-taping brings back 80–90% of original performance. That buys you two to three extra seasons.
Conclusion
Here's the truth most gear reviews skip: no seam construction is superior across the board — there's only the right one for your specific abuse pattern.
Bonded and sonic-welded seams lead on cold-water durability and flex fatigue resistance. That makes them the clear choice for serious fly fishing and steelhead use. These waders go trip after trip without drying out in between, and bonded seams hold up to that stress better than anything else.
Sewn-and-sealed construction at the mid-to-premium price tier is no pushover either. It handles duck hunting's brutal mud-and-kneel cycle well. But it needs more consistent maintenance to stay watertight.
What kills waders isn't the seam technology. It's neglect hitting a stress point that was already starting to fail.
A few habits make the difference:
Hang them dry after every outing
Rinse silt out of the seam valleys
Spot micro-delamination early — before it turns into a cold, shin-deep leak in November
You have the framework now. Go pick the right pair — and put in the care to make it last.