First-time factory orders for custom fishing shirts usually go one of two ways. You overpay a middleman who marks everything up by 40%. Or you wire money overseas, then spend three months chasing replies and hoping your shipment isn't a mess.
Neither outcome is guaranteed. Knowing how the process works — before you spend a dollar — helps you avoid both.
The factory ordering process follows a specific logic. It doesn't matter if you're outfitting a tournament team, launching a fishing apparel private label, or getting 50 jerseys made for your fishing club. The same rules apply.
Grasp that logic, and you'll negotiate like someone who's done this a dozen times. This guide covers every step — from locking down your specs to inspecting the box that lands at your door.
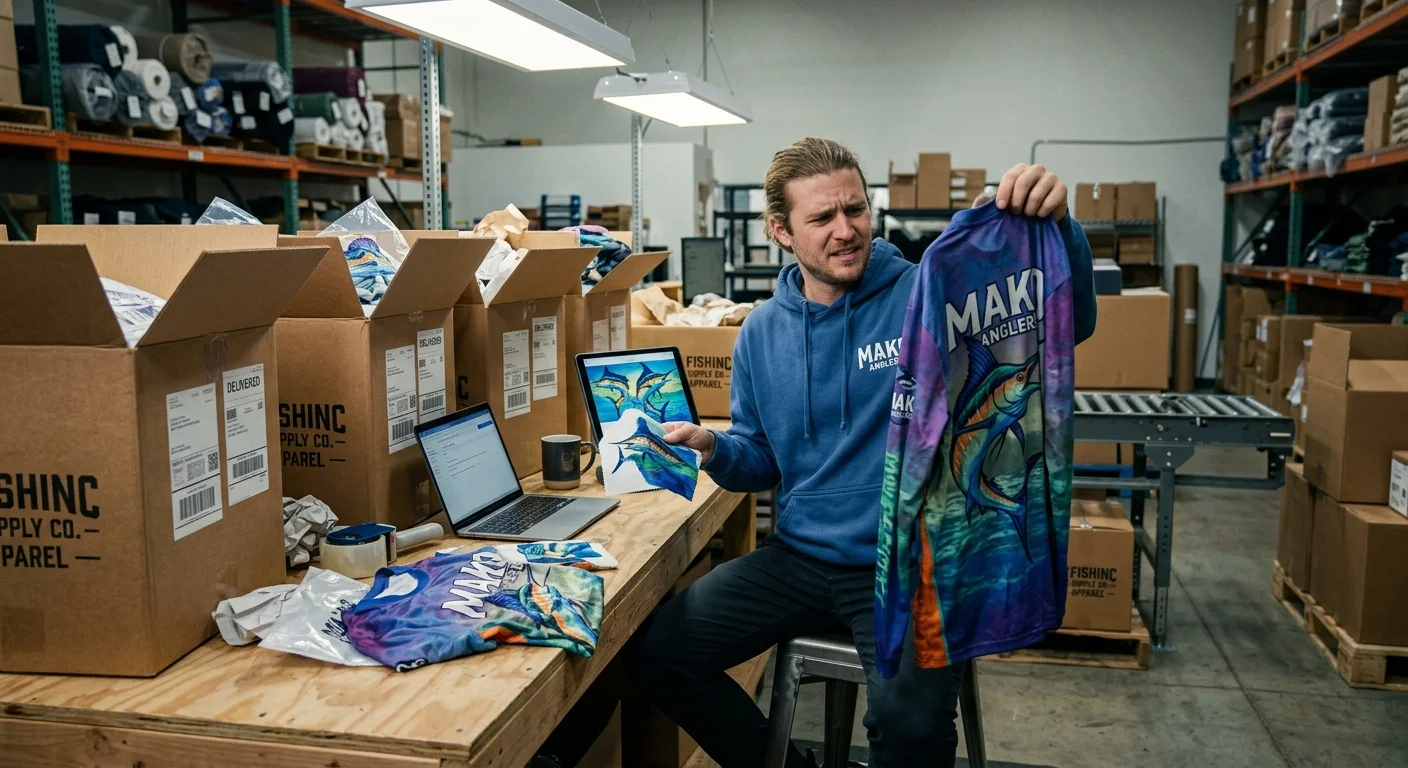
Intro CTA (Top)Step 1: Define Your Custom Fishing Shirt Requirements Before Contacting Any Factory
Most factory conversations fall apart in the first five minutes. Not because of pricing. Because the buyer didn't know what they needed.
Write down your answers to these questions before you contact a single supplier. Factories move fast. Be vague, and they'll fill in the blanks for you. That never ends well.
Your pre-contact checklist:
- Purpose — Tournament team, fishing club, charter company merch, or weekend crew shirts? Each has a different graphic direction.
- Conditions — Hot, sun-exposed days call for lightweight UPF 50+ polyester. Cooler mornings need a fabric with some insulation.
- Fabric — 100% polyester is the standard choice for moisture-wicking, quick-drying performance and UPF 50+ protection (blocks 98% of UV rays). Know this before you ask.
- Features — Vented panels? Zippered pockets? These aren't upgrades — they're specs you declare upfront.
- Colors and graphics — Using a boat photo? Provide a clean full-hull image: no docks, no people, no blur.
- Quantity — The standard MOQ for sublimation printing is 150 pieces. Drop below that, and your factory options shrink fast.
Lock these down first. You're no longer a first-timer with vague questions. You become a buyer with a clear brief — and factories treat those two types of people very differently.
Timeline note: From the moment your requirements are set, expect 90–120 days to finished product. That clock doesn't start until your specs are clear.
Step 2: Understand Fabric Options and Performance Specs — So You Can Negotiate With Knowledge
Here's what nobody tells you about talking to fishing shirt factories: they speak a technical language. Don't speak it back, and they'll make every decision for you.
That's not malicious. It's just how the dynamic works. Show fabric knowledge, and the conversation shifts. You stop being a retail customer and start being a wholesale buyer. That shift is worth real money.
The Three Fabrics That Matter for Fishing Shirts
Forget cotton. For performance fishing apparel, there are three core options:
| Fabric | GSM Range | UPF Rating | Moisture-Wicking | Cost Range (per piece) |
|---|---|---|---|---|
| 100% Polyester (knit) | 120–160 gsm | 50+ | Excellent | $4–$8 |
| Polyester-Spandex Blend | 150–180 gsm | 40–50 | Very Good | $6–$11 |
| Recycled Polyester | 130–160 gsm | 50+ | Excellent | $7–$13 |
100% polyester is the factory workhorse. It's the backbone of sublimation printing fishing apparel because the dye bonds straight to the fiber. No polyester content means no true sublimation. Full stop.
Polyester-spandex blends (88/12 or 92/8 are common ratios) add stretch. Great for tournament fishing shirts where mobility counts. There's a slight upcharge, but worth it if your customers are casting all day.
Recycled polyester is gaining ground fast. It checks a sustainability box for fishing apparel private label brands. It also often carries OEKO-TEX certification — worth requesting documentation for, especially for European markets.
The Specs You Need Before Requesting a Quote
Send an RFQ (Request for Quotation) with these exact data points:
- GSM — Request fabric swatches from the factory and verify the weight yourself. Don't accept "lightweight" as a spec. Pin them to a number: 130 gsm or 150 gsm.
- Fiber content percentage — "Polyester blend" means nothing. Get "92% polyester, 8% spandex" in writing.
- UPF certification — Ask if the fabric went through third-party testing or if the UPF rating is just a factory claim. There's a real difference.
- Shrinkage rate — Any solid factory holds post-wash test data. Ask for it. For moisture-wicking fishing jerseys, keep shrinkage under 3%.
- PMS color codes — Your design has specific brand colors? Use Pantone codes. Don't say "navy blue."
One Negotiation Lever Most First-Timers Miss
Volume unlocks better pricing — but you have to ask for the breakdown. Send one email requesting prices at 150 pieces, 300 pieces, and 500 pieces. Seeing the per-unit cost drop from $7.50 to $5.80 across those tiers turns your MOQ decision into a clear business calculation. No guessing.
Also ask about color run surcharges. Some factories charge a small-run fee for splitting orders across too many colorways. Know this upfront. You can consolidate design choices early — and keep your bulk fishing shirt order cost predictable.
Step 3: Prepare Your Design Files to Factory-Ready Standards
Factories reject more first orders over bad design files than over pricing disputes. That's the single most preventable delay in the entire custom fishing shirt process.
Here's the problem: most people send a logo downloaded from their website — a PNG saved at 72 DPI, in RGB color mode. The factory prints it blurry. Or it spends three days asking for corrections. Your timeline slips. Your sample gets delayed. You've already lost a week before production starts.
Don't be that buyer.
The Non-Negotiable File Specs
Run every asset through this checklist before sending a single file to a sublimation printing factory:
- Resolution: 300 DPI minimum. No exceptions. Anything lower pixelates on fabric. Scanning a logo from print? Scan it at 300 DPI at actual print size — don't scale it up afterward.
- File format: Send AI, EPS, PDF, or TIFF. Avoid JPG and PNG for primary artwork. Vector formats (AI, EPS) work best for sublimation fishing apparel — they scale with zero quality loss.
- Color mode: Switch from RGB to CMYK before submission. Colors that look vivid on your screen in RGB can shift a lot once printed. CMYK is what the press reads.
- Bleed area: Add 3–6 mm beyond the trim edge. This buffer stops white borders from showing up on cut edges.
What Goes Into a Complete Design Package
A factory-ready submission isn't just a graphic file. It's a full tech pack. Here's what to include:
- Technical flat drawings of the shirt (front, back, sleeve)
- Exact placement measurements for every graphic element
- PMS (Pantone) color codes for all brand colors
- Size grading chart with point-of-measure (POM) tolerances — ±0.5 cm is standard
- Label specs and packaging requirements
Send everything as one organized folder. Factories that receive clean tech packs push those orders to the front of the queue. That's not speculation — it's production room reality.
Quick rule: Your designer doesn't know garment tech packs? Hire a freelancer on Fiverr or Upwork who specializes in apparel manufacturing documentation. It runs $50–$150 and saves you weeks of back-and-forth.
Step 4: Find Reliable Factories and Know What to Ask in First Contact
Finding a factory is easy. Finding the right factory is the hard part. You need one that won't ghost you after the deposit, cut corners on UPF certification, or pass your sublimation files to a subcontractor without telling you. That difference separates a successful first order from an expensive lesson.
The fishing apparel space is packed with factories that look the same on Alibaba. Same product photos. Same buzzwords. Same "15 years of experience" claims. The real filter happens in that first conversation.
Before you contact a single supplier, write down your shortlist criteria on paper. What matters most to you? Sublimation printing done in-house (not outsourced)? MOQ flexibility under 200 pieces? Documented UPF 50+ testing? Rank these priorities. Go into a factory conversation without that ranked list, and you'll talk yourself into settling for "good enough" just because they replied fast.
The 10 Questions That Separate Serious Factories From Time-Wasters
Send these in your first message — or ask them on your first call. A factory that fumbles or dodges more than two of these is giving you a clear signal:
- Can you share past work on similar fishing or performance sportswear? Not general apparel — ask for moisture-wicking fishing jerseys or dye sublimation sportswear. Request photos of finished orders.
- What's your MOQ for sublimation printing? Standard range is 100–200 pieces. Any MOQ far below that range deserves a closer look.
- Is sublimation printing done in-house or outsourced? In-house means faster turnaround and tighter quality control. Outsourced adds a variable you can't see or control.
- What are your standard lead times from design approval to shipment? A realistic answer is 25–35 days for production after sample approval. Anyone promising 10 days on a first order is either skipping steps or not being straight with you.
- What quality standards do you follow? Ask for documentation — OEKO-TEX, ISO, or third-party lab test results on UPF ratings.
- What are your payment terms? Industry standard is 30% deposit, 70% before shipment. Be cautious of any factory demanding 50–50 upfront from a new buyer.
- How do you handle design file issues during production? This reveals their communication process. Good factories run a dedicated QC checkpoint before printing begins.
- What fabrics do you keep in stock? A factory with stable supplier relationships for 130–150 gsm polyester knit is in a stronger position than one sourcing fabric order-by-order.
- What's included in your quoted price? Get this in writing: fabric, printing, cutting, sewing, labels, and packaging. Skip this question and surprises show up in the final invoice.
- Can you scale if my order doubles next season? A factory capped at 500 pieces per month is the wrong partner for a fishing apparel private label with real growth plans.
One Red Flag Most Beginners Miss
Watch for factories that promise very short lead times in the first response. That's a sales tactic, not a production reality. The factory rushing to close the deal with quick promises is often the same one sending "almost ready" update emails for six straight weeks.
Ask for their last two purchase orders from established clients — or at least named references you can check. Solid custom outdoor performance apparel factories have no problem with this request. The ones with something to hide will shift fast to showing you more catalog photos instead.
Mid CTAPractical tip: Run your top three candidates through the same question list at the same time. Compare their answers side-by-side. That's the fastest way to evaluate factories — no factory visit required.
Step 5: Understand Pricing Structure and Build Your First-Order Budget
Pricing is where most first-time buyers get caught off guard — not because factories are dishonest, but because nobody breaks down how the numbers add up.
Here's what you need to know before you approve a single quote.
What Factory Pricing Is Made Of
Every quote breaks down into two buckets:
- Fixed costs — sampling fees, setup charges, mold costs for custom labels or hangtags
- Variable costs — fabric, sublimation printing, cutting, sewing, packaging, and any special trims
Your per-unit price is the total of both, split across your order quantity. That's why MOQ matters so much. At 150 pieces, fixed costs hit harder per shirt. At 500 pieces, they barely register.
The Volume Tier Reality
Sublimation printing factories use a tiered price structure. Here's what a real breakdown looks like:
| Order Quantity | Estimated Unit Price |
|---|---|
| 150 pieces | $7.00–$9.50 |
| 300 pieces | $5.80–$7.50 |
| 500+ pieces | $4.50–$6.00 |
That gap between 150 and 500 units is not small. On a 500-piece order at $4.50 versus $9.50, you save $2,500. That covers your entire sampling budget — with money left over.
Build Your First-Order Budget in Four Lines
Stop guessing. Run this calculation before you contact a factory:
- Unit cost × quantity = production subtotal
- Add sampling fee ($80–$200 for one sample, non-refundable at most factories)
- Add shipping + import duties (8–15% of declared goods value for US imports)
- Add a 10% buffer for revisions, size add-ons, or re-samples
A first order of 150 custom tournament fishing shirts runs $1,400–$2,000 all-in, before design costs. Know that number before you start talking to factories. It keeps the negotiation grounded — for both sides.
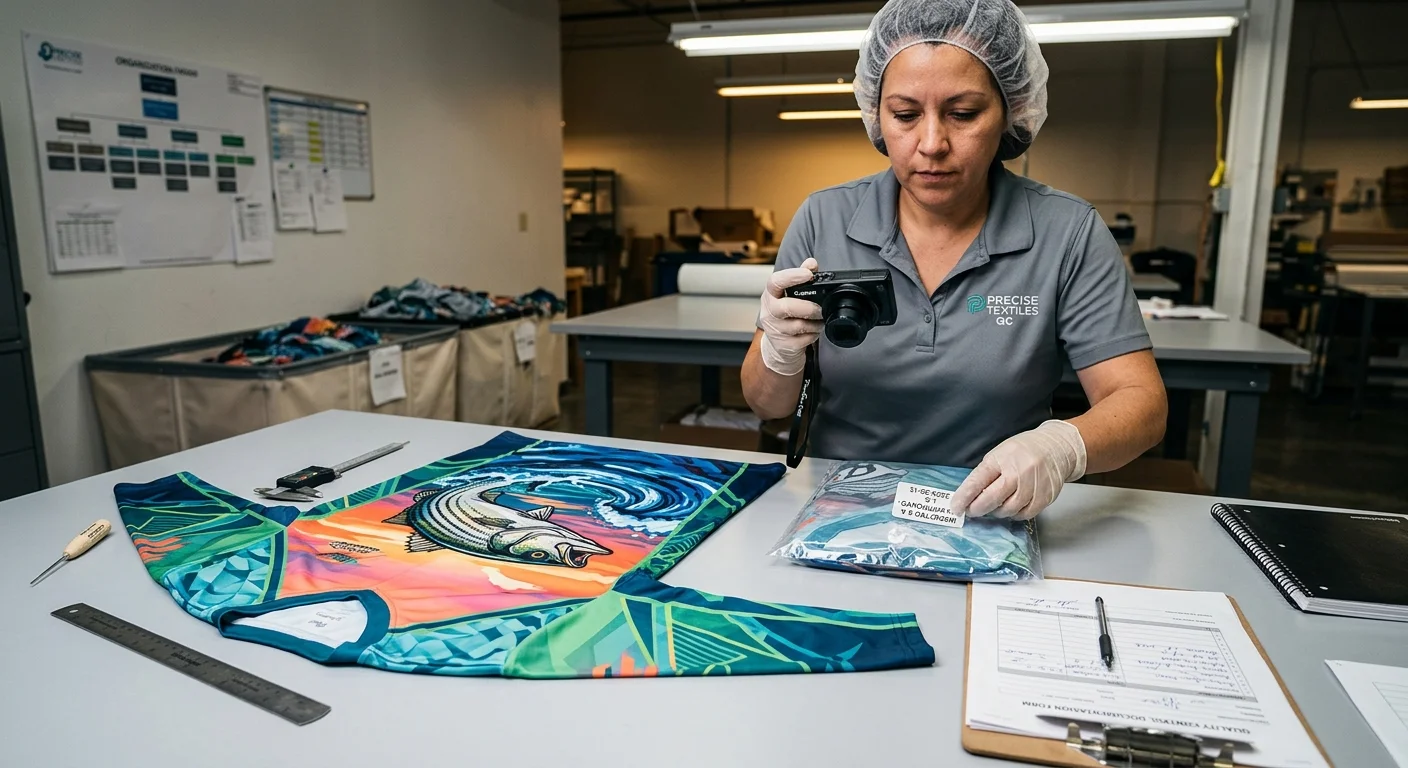
Step 6: The Sample Approval Process Before Committing to Bulk
The sample stage is the one point in this entire process where you can catch a factory's mistakes on their dime instead of yours.
Most first-timers treat samples as a formality — a box to check before the real order. That's backwards. The sample is the real order, just at a scale where the stakes are manageable. Get this step right, and bulk production goes without a hitch. Skip it or rush it, and you're betting $1,400–$2,000 on a factory you've never tested under pressure.
Here's what separates experienced buyers from people who learn things the hard way. Never approve bulk production without a pre-production sample (PPS). It must use actual production tooling, real materials, and the same processes that will run on the factory floor. Not a prototype. Not a mock-up. The real thing — just one or two pieces.
What to Evaluate When Your Sample Arrives
Don't just hold the shirt up and eyeball it. Run it through a structured review:
| Check | What to Do | Red Flag |
|---|---|---|
| Dimensions | Measure every point against your spec sheet | More than ±0.5 cm off on chest, length, or sleeve |
| Color accuracy | Compare against your PMS codes under daylight | Uneven dye, shade shift, inconsistent coverage |
| Sublimation print quality | Inspect edges, gradients, fine text | Bleeding edges, pixelation, color banding |
| Fabric feel and weight | Weigh it; compare to spec GSM | Lighter than ordered, rough texture |
| Construction | Pull seams, test zippers, check stitching | Loose threads, puckering, uneven tension |
| UPF performance | Request lab test report — don't accept verbal confirmation | No documentation, vague "50+" claim |
Wear it. Stretch it. Run it through a wash cycle. A moisture-wicking fishing jersey that pills or loses its stretch after one wash turns into a return-rate nightmare fast.
The Golden Sample Protocol
Once a sample passes your review, seal it. This step matters more than most buyers ever act on.
- Assign it a unique ID
- Sign and date all sides; photograph every angle at high resolution
- Write down key measurements, color codes, and fabric weight on the documentation sheet
- Send sealed copies to: the factory floor, your QC contact, and your own records
That sealed golden sample becomes the legal and practical benchmark for your entire bulk run. Production teams drift — different operators, adjusted equipment settings, a swapped fabric. You need a physical reference point to push back with. Without one, "close enough" becomes the factory's default standard.
Before You Wire the Bulk Deposit
Go through this checklist. Check every item before you release payment:
- Sample approved in writing by you (email confirmation is fine)
- Final specs locked: GSM, fiber content, UPF rating, colorways
- Golden sample sealed and distributed to all parties
- MOQ, unit pricing, and payment terms confirmed in writing
- Production timeline and ship date agreed — get a date, not a range
- Incoterms clarified (FOB, CIF, EXW — know which one applies to your shipment)
One more thing worth negotiating before you sign off: ask the factory to credit your sample fee toward the first bulk order. Most solid sublimation printing factories will say yes — it shows confidence in their own quality. Hard pushback on this tells you something worth paying attention to.
The sample stage adds 10–14 days to your timeline. Budget for it. A factory that offers to skip straight to bulk "to save you time" is the same factory that ships you something unrecognizable six weeks later.
Step 7: Finalize Order, Track Production, and Inspect Delivery
Money wired. Sample approved. Production starts — and this is where most first-time buyers make their biggest mistake. They disappear.
They assume the factory handles everything. Then they check back in once the shipment lands. By that point, nothing is fixable.
Stay visible during production. That visibility costs nothing. Think of it as free insurance.
Set a Production Check-In Schedule
Your bulk deposit clears. Right then, set up three fixed check-in points with your factory contact:
- Day 7 — Confirm fabric cutting has started. Ask for a photo of cut panels next to your golden sample.
- Day 15 — Request a mid-run photo of printed shirts coming off the sublimation line.
- Day 25 — Ask for a pre-shipment QC summary before the boxes get sealed.
These aren't micromanagement moves. They're simple checkpoints. They catch problems — a color shift, a fabric swap, a sizing error — while fixes still take hours, not thousands of dollars.
Before the Box Leaves the Factory
Ask for a pre-shipment inspection report. At minimum, it should cover:
- Piece count by size and colorway
- Measurement checks against your POM spec sheet (tolerance: ±0.5 cm)
- Photo documentation of packed cartons
Orders over 300 pieces? Hire a third-party inspection service. Companies like QIMA or Bureau Veritas charge $200–$350 per inspection day. That's a small number compared to rejecting an entire shipment at your warehouse.
Box Arrives — Inspect Before You Sign
Open the boxes that same day. Don't wait. Pull a random sample — at least 10% of total units — and check each piece against your golden sample. Look at color consistency, print quality, and construction. Something looks off? Get dated photo evidence before you accept the shipment.
That documentation is your leverage. Without it, the conversation with the factory gets harder, fast.
Common First-Timer Mistakes and How to Avoid Them
Seven steps, one guide — and still, first-time buyers find ways to derail their orders. Not because they didn't read. Because the mistakes don't look like mistakes until the damage is done.
Here are the ones that cost people real money:
Sending a low-res logo and hoping for the best. A 72 DPI PNG looks fine on your laptop. On a sublimation press running at production speed, it prints as a blurry smear across the chest. Submit 300 DPI vector files in CMYK. Every time.
Approving the sample over a photo. The factory sends you a picture of the shirt. Looks great. You approve it. The bulk run arrives and the colors are off by two shades. Request the physical sample. Hold it. Measure it. Wash it once.
Chasing the lowest MOQ without checking what gets cut. A factory offering 50-piece runs at the same price as a 150-piece minimum is cutting corners somewhere. That means lower fabric grade, weaker print quality, or your order sitting at the back of their production queue. You pay the same. You get less.
Going dark after wiring the deposit. The factory reads silence as flexibility. Check in at Day 7, Day 15, and Day 25. Three emails. That's it. Problems caught mid-run cost hours. Problems caught at the dock cost thousands.
Skipping the golden sample seal. You approved it — great. But did you document it? Get a signed, photographed reference sample on file. Keep it. Without one, "close enough" becomes the production standard. You won't know until the boxes are open.
Conclusion
You've just learned what most people figure out after three failed factory orders — in one read.
Here's what nobody tells you upfront: ordering custom fishing shirts from a factory isn't complicated. It's just unfamiliar. And unfamiliar problems feel overwhelming until someone shows you the way.
Now you have the way.
You know how to evaluate a factory before handing over your money. You know how to read a fabric spec sheet. You know how to submit a print-ready design file. And you know how to spot red flags during sample review — the exact stage where most first-timers get hurt. If you want a head start on the supplier side, Runfish runs OEM & ODM services with in-house sublimation and UPF-tested fabrics.
Your next move is simple:
- Pick one factory from your shortlist
- Send them a structured inquiry using the framework from Step 4
- Request a sample within the week
Don't overthink it. The gap between a good idea and an actual product is smaller than it looks. You're closer to crossing it than you've ever been.
Closing CTA Author Related Posts: pending (this is the first post_article page on the site). Backfill on next run after 2+ sibling articles exist.