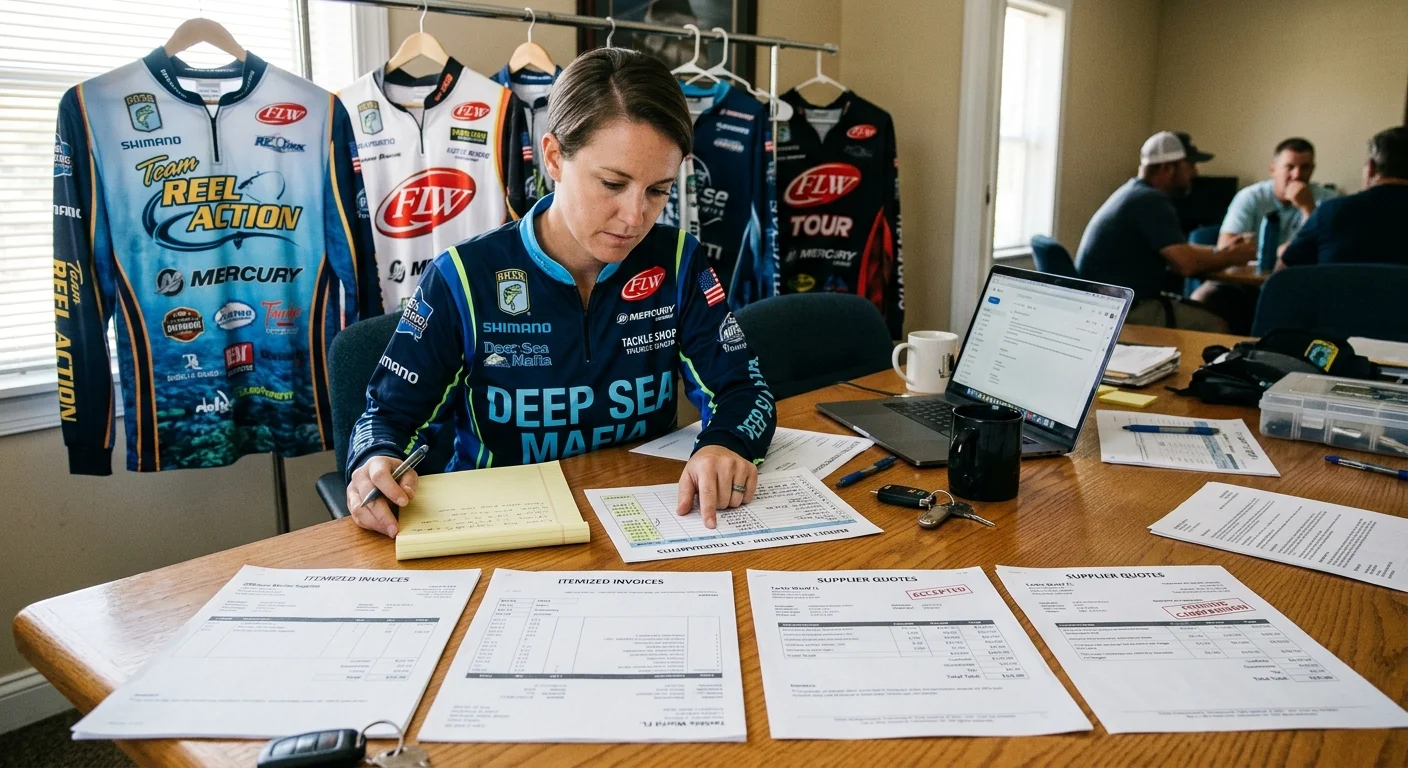
Three weeks before tournament day, the chaos is real. Your group chat is flooded with conflicting size requests. The sponsor logo file is 72 DPI — unusable. And the tournament fishing shirts supplier website says "fast turnaround" but never tells you what that means.
Sound familiar?
Ordering tournament fishing shirts for a team isn't complicated. But the margin for error is thin, and most first-time organizers don't catch the gaps until it's too late to fix them.
This guide gives you a battle-tested, week-by-week ordering process. You'll cover:
1.Locking down sizing from your team
2.Choosing between sublimated fishing shirts and screen print
3.Getting sponsor logos placed right the first time
Follow this, and your crew hits the water looking unified, professional, and ready to compete.
Step 1: Set Your Timeline — Work Backward From Tournament Day
Eight weeks is enough time. Six weeks is tight. Anything under four weeks, and you're gambling.
Open your calendar right now — before you pick colors, before you brief the sponsor, before you do anything else. Count backward from tournament day. That's the single most important move you can make as a team organizer.
Here's the framework that works:
8 Weeks Out — Lock the order window
This is your hard deadline for placing the bulk fishing shirts order. Dye sublimation fishing jerseys aren't printed off a shelf. A good tournament fishing shirts supplier needs 2–3 weeks for production. Add shipping time on top of that. Build it in first , not last.
6 Weeks Out — Finalize design and collect sizes
Get your custom fishing shirt design approved. Confirm every teammate's size. (Step 3 covers the size collection process in detail — it takes longer than most organizers expect.)
4 Weeks Out — Sponsor logo files confirmed
Lock down every logo file, placement spec, and color code. No surprises at press time.
2 Weeks Out — Receive and inspect
You want shirts in hand with enough time to spot a problem and fix it before race day.
The conservative buffer rule: Take whatever timeframe a supplier quotes you, then add three days. Always. Artwork revisions, shipping delays, and holidays don't care about your tournament schedule. They happen anyway.
Print the calendar. Block the dates. Everything else in this guide slots into that structure.
Step 2: Collect Team Details and Lock Down Sizing
Sizing mistakes are the number one reason team orders go wrong — not design issues, not tournament fishing apparel supplier problems. Someone submits the wrong size. You miss it. Three weeks later, a teammate is standing on the dock in a shirt that fits like a trash bag.
Get this step right, and everything after it becomes easier.
Build your master list first. Before sending a single message, create a spreadsheet with every participant's name, email, and role. This becomes your source of truth for the entire order.
Send one collection form — and make it required. Use Google Forms, a paper sheet at practice, or a group text. Capture these fields from every person:
Full name
Size (XS through 2XL+)
Style preference — standard fit or athletic/fitted cut
Any special requests or notes
Set a firm submission deadline. Not a suggestion — a hard cutoff. Skip this, and you'll spend the final week chasing three stragglers while your supplier waits on the count.
Audit before you order. Once responses are in, look at your size distribution and flag anything unusual. A team of 12 with four XS submissions has a data entry error somewhere — check it. Your totals need to match your participant headcount. No gaps, no extras.
Common mistake: Skipping the confirmation step. After you tally everything, send a quick "Here's what I have for you — confirm by Friday" message to each teammate. Thirty seconds of friction now stops a wrong-size nightmare later.
Export everything to a clean spreadsheet, sorted by size. That's what you hand your supplier.
Step 3: Choose Your Fabric and Printing Method
Most team organizers overthink this part. A few go the other way — they default to the cheapest option and regret it later.
Your printing method shapes everything. It decides how your shirts look on tournament day. It determines how well they hold up after a season of salt spray and repeated washing. It's the difference between a sponsor logo that looks sharp and one that looks blurry. Get this right, and your crew looks professional every time they step onto the dock.
The Two Methods That Matter for Tournament Shirts
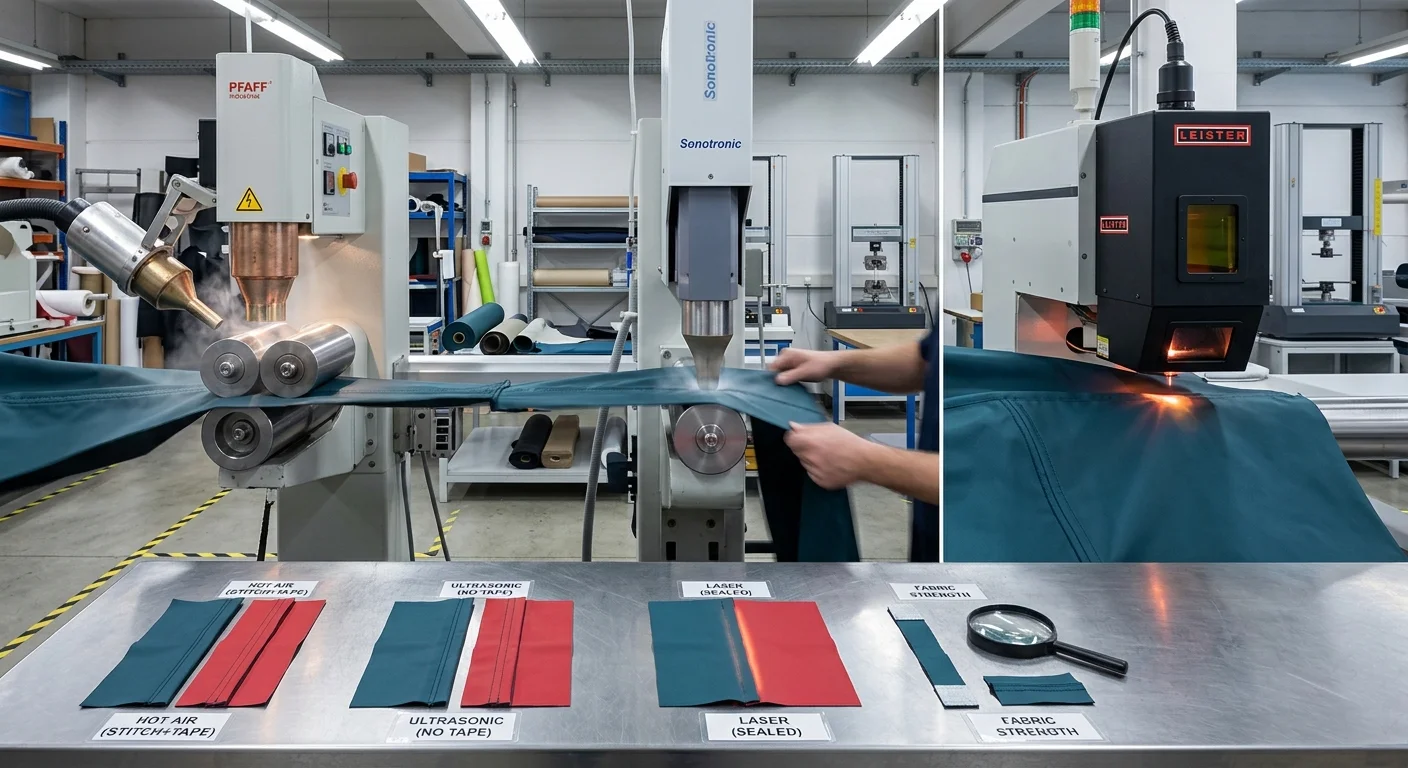
Six printing methods exist. For a fishing team uniform order, two are worth your time: dye sublimation and screen printing . The rest — heat transfer, block printing, pigment printing — all have limitations that make them the wrong fit for this job.
Dye sublimation fishing jerseys are the top choice for tournament teams. Here's how it works: the ink bonds into the polyester fibers under heat and pressure. It doesn't sit on top of the fabric — it becomes part of it. You get a soft hand-feel, fade-resistant color, and photographic-quality detail across the entire shirt. Full-color sponsor logos, gradient patterns, complex artwork — all handled without extra setup cost per color. Got a long sleeve tournament fishing shirt with a gradient and four different sponsor logos? Sublimation handles that in one pass.
The catch: sublimation works on 100% polyester fabric only. That's fine. Polyester is what you want for tournament fishing anyway — it's the base of every moisture-wicking fishing shirt built for competition.
Screen printing is the right call for simple designs — think a single-color team logo on a solid base. It's cost-efficient at scale. Colors come out vibrant and last a long time. It also works across fabric types, including cotton blends. The tradeoff is setup cost. Each color needs its own screen, so a four-color logo means four separate setup fees. For complex tournament designs with gradients or photo-quality artwork, screen printing runs into limits fast.
The Decision Is Simpler Than It Looks
Go through this before you call any tournament fishing apparel supplier:
Full-color design, sponsor logos, gradient patterns? → Sublimation. Every time.
Simple logo, solid background, mixed fabric options? → Screen printing.
Tight budget and large order (30+ shirts)? → Screen printing cuts your per-unit cost on straightforward designs.
Need UPF 50 fishing tournament shirt performance fabric? → Sublimation on polyester is your real path here.
Hard rule: Never let a supplier push heat transfer on a bulk fishing shirts order. It looks fine in photos. After six washes, it cracks and leaves a shiny film that looks amateur under tournament lighting. Don't go there.
Fabric Is Part of the Same Decision
You're not picking fabric as a separate step — you're picking a fabric-and-print combination together. For tournament fishing shirts, the answer is 100% polyester with dye sublimation. It's breathable, lightweight, and what every serious fishing shirt printing supplier uses for performance gear.
Some teammates may push for cotton. A cotton-poly blend (60/40) works with screen printing. Just know sublimation won't bond to cotton — the colors wash out fast. Lock in your fabric choice before you brief your designer. The artwork specs are different between the two methods, and changing course mid-process costs time and money.
One last thing: long tournament days mean hours in open sun. Make sure your supplier confirms UPF 50 protection in the polyester weave. It's not a given — ask for it directly.
Step 4: Plan Your Design and Sponsor Logo Layout

Design is where most team orders fall apart — not because the organizer didn't care, but because nobody set clear rules before the artwork started.
By week six, lock in two things: a confirmed design brief and every sponsor logo file in hand. If either one is still missing, your timeline is already slipping.
Build Your Design Brief Before You Touch Any Software
Don't start designing — or briefing a designer — until you have a written list of what goes on the shirt. Keep it short. Five elements maximum:
Team name and tournament series (e.g., "Redline Bass Club — Bassmaster Opens 2025")
Primary color scheme — pull from your existing team branding, not what looks good on a screen
Number of sponsor logos and their tier (title sponsor vs. secondary vs. patch-level)
Required text — angler names, numbers, or any tournament-required identifiers
Shirt style reference — long sleeve tournament fishing shirt, short sleeve, or performance hoodie
Send that list to your supplier or designer before anyone opens Photoshop. It sounds obvious. Most organizers skip it. Then they spend two weeks on revisions that a 10-minute brief would have stopped.
Sponsor Logo Files: What "Print-Ready" Means
This is the single most common source of delay on custom fishing shirt design orders. A sponsor emails you a PNG file pulled from their website — 72 DPI, white background baked in, no vector version available. That file will not print sharp on a sublimated fishing shirt. Period.
Contact each sponsor and ask for this:
Vector file (.AI or .EPS format) — scales without losing quality
Minimum 300 DPI — required if they only have raster files
Transparent background — no white or colored fill behind the logo
Pantone or CMYK color values — not just a screenshot of their brand guide
Give sponsors a two-week deadline to deliver files. Not a suggestion — a hard cutoff with a follow-up reminder built in. A sponsor who misses it leaves you two choices: simplify their logo placement, or drop them from the shirt. Harsh, but protecting your timeline is your job.
Logo Placement: The Layout That Works
Sponsor placement on a fishing team uniform follows a simple hierarchy. Title sponsor gets the most visible space. Secondary sponsors fill in around it. Patch-level logos stay small and grouped.
Here's the layout that works on both sublimated fishing jerseys and screen-printed shirts:
Position | Best Used For |
|---|---|
Left chest (primary) | Title sponsor or team logo |
Right chest | Secondary sponsor |
Upper back (full width) | Team name or main design element |
Left sleeve | Additional sponsor |
Right sleeve | Tournament series badge or event logo |
Lower back | Small patch-level sponsors, 2–3 max |
Don't crowd it. A fishing shirt printing job with eight logos stuffed into every panel looks desperate, not professional. A sponsor who wants premium placement after you've committed that space? Go back to them before the design brief reaches your supplier. Sorting placement in a quick call takes five minutes. Sorting it after proofs are approved adds a week.
One rule that will save you a color dispute: Before you approve final artwork, ask your supplier for a printed test swatch of each sponsor's logo color. Screen colors lie. Royal blue on your laptop prints as a different shade on polyester under sublimation heat. A swatch check removes the color argument after shirts arrive — and that argument is one of the most painful, most avoidable problems in any bulk fishing shirts order.
Lock the design brief. Collect print-ready files. Confirm placement hierarchy. In that order, every time.
Step 5: Evaluate Providers Against Three Hard Criteria
Most organizers pick a supplier the same way they pick a restaurant — look at the photos, skim a few reviews, go with their gut. That works fine for dinner. It does not work when you're responsible for 20 people showing up to tournament day in matching shirts.
By week seven, you should have two or three fishing shirts suppliers on your shortlist. Now run them through three non-negotiable filters. Not five. Not ten. Three. A supplier fails any one of them — move on.
Criterion 1: Confirmed Turnaround Time in Writing
"Fast turnaround" is not a turnaround time. Neither is "2–3 weeks, give or take."
Ask every supplier to confirm their production timeline in writing. You want the full window — from artwork approval to shipping. What you need: production done in 10–14 business days, plus a specific ship date they'll commit to. They hedge, give vague answers, or point you to a FAQ page instead of a real number? That's your answer right there.
Add their confirmed ship date to the calendar framework you built in Step 1. The shirts need to arrive at least two weeks before tournament day. Miss that window and they're off the list — no matter how good the samples look.
Criterion 2: Sublimation Capability on Performance Polyester
Not every supplier selling "custom fishing shirts" does true dye sublimation on UPF-rated polyester. Some use heat transfer and call it sublimation. Others hand off production to a third party and can't confirm the fabric spec at all.
Ask these three questions straight out:
1.Do you print in-house or subcontract production?
2.Can you confirm UPF 50 rating on your tournament polyester?
3.Can you send a printed fabric swatch before I place a bulk order?
A real sublimation fishing shirt supplier answers all three fast, with no hesitation. A supplier who stumbles on the swatch request — or says swatches aren't available for bulk orders — is telling you something. They don't want you to see the color output before you've already paid.
Criterion 3: Minimum Order Quantity That Matches Your Team Size
Some of the best sublimated fishing jersey suppliers out there carry MOQs of 20 or 25 pieces. Your team is 12 people? That supplier is not your supplier — regardless of how sharp their samples look.
Check MOQ before you share a single artwork file. Check it again during pricing talks. Teams of 10 to 15 should look for fishing shirts suppliers with MOQs of 12 or fewer. Teams of 20 to 30 have more choices and more room to push on per-unit cost.
Team Size | Target MOQ | Expected Per-Unit Range |
|---|---|---|
10–15 people | 12 or fewer | $45–$75 per shirt |
16–25 people | 20 or fewer | $35–$60 per shirt |
26–35 people | 25 or fewer | $28–$50 per shirt |
The swatch rule applies here too. Before you sign off on final artwork and pay a deposit, get a printed swatch of at least one sponsor logo color. Price gaps between suppliers usually come down to production quality. The color on your monitor will not match what comes off the sublimation press — that's just how it works. That five-minute check cuts out the most common post-delivery dispute in any personalized fishing shirts with logo order.
Run every supplier through all three criteria. The one who clears all three — confirmed turnaround in writing, verified sublimation on UPF polyester, and an MOQ your team size can hit — is the supplier you call first in week six.
Step 6: Place Your Order and Confirm Every Detail
You've done the hard work. Don't lose it in the last five minutes.
Placing a bulk fishing shirts order feels like the finish line — but this is the moment most organizers get sloppy. A mistyped size count, an unconfirmed ship date, a missing logo file that slipped through review. Small oversights here turn into expensive problems. You can't fix them after payment goes through.
Before you hit submit, run this confirmation checklist in order:
Size totals match your master spreadsheet — count again, line by line, by hand
All sponsor logo files are attached in the final artwork package — .AI or .EPS format, 300 DPI minimum, transparent backgrounds
Production and ship dates are confirmed in writing — not estimated, not implied. A real date, in an email or order document you can point back to
Fabric spec and UPF 50 rating are listed on your order confirmation — not there? Ask for an updated document before you pay
Your deposit amount and payment terms are clear — most suppliers require 50% upfront. Know exactly what triggers the balance due
Once you submit, request a written order confirmation within 24 hours. No response? Follow up right away. That confirmation is your contract. It protects you if the shirts show up wrong or late.
Last gut-check: Anything feels unclear at this stage — ask. One clarifying email now is worth ten arguments after delivery.
Step 7: Track Production and Prepare for Delivery
The order is placed. Now the waiting starts — and waiting without a system is how things slip.
Production on a custom sublimated fishing jersey order moves fast once it starts. Problems move faster. Some organizers pay the deposit, go quiet, and assume no news is good news. That's exactly how orders go wrong at this stage.
Don't do that.
Send a check-in message to your supplier 5–7 days after order confirmation. Ask two things: has artwork been approved on their end, and is production on schedule? You're not pestering them. You're managing a deadline with 20 people depending on it.
Build a simple tracking note with three fields:
1.Confirmed production start date
2.Expected ship date (from written confirmation)
3.Your personal receive-by deadline (tournament day minus 14 days)
Shirts ship? Get the tracking number that same day. Don't wait for them to send it on their own.
The package arrives — inspect it right away. Check every shirt against your master size spreadsheet. Flag color inconsistencies on sponsor logos before you sign off on anything. Something is wrong? You need days to escalate, not hours.
Two weeks of buffer before tournament day isn't comfort margin. It's your correction window. Guard it.
Conclusion
Seven steps. Eight weeks. One team that shows up to the water ready to compete.
Start earlier than you think you need to. Work the process — don't wing it. That's the difference between a smooth delivery and a last-minute scramble. Lock your timeline first. Chase sizing before anyone forgets. Never give a sublimated fishing shirt order to a vendor who can't show you a printed sample and a written production schedule.
Your team's uniform is the first statement you make before a single line hits the water. Make it count.
Here's your next move:
1.Pull up the 8-week countdown
2.Set Week 8 as today
3.Send your sizing collection form to every teammate before you close this tab
The squads that look unified on tournament day didn't get lucky. They started this checklist while everyone else was still "thinking about it."
Now go get your team dressed to win.