Most fishing vests look nearly the same on the rack — rows of pockets, some mesh panels, a few loops dangling off the front. But the details hiding underneath those similarities can either ruin your day on the water or make it feel effortless. Most buyers don't spot those details until it's too late.
You've probably been there. Unzipping a pocket mid-cast and watching your tippet spools drop straight into the river. Sweating through a neoprene-backed vest on a July afternoon and asking yourself why you even put it on. Those moments don't come from bad luck — they come from the wrong vest.
Picking the right fishing vest isn't about finding the one with the most pockets or the longest feature list.For brands developing custom fishing vests for different angling styles, understanding these performance-critical features is often more important than simply adding more pockets. It's about knowing which seven features do real work out on the water — and which ones are just stitched-on marketing with nothing behind them.
That's what this guide is for. It gives you a practical, field-tested framework. Hold it up against any vest, and you'll know within minutes whether it's worth your money.
Fishing Vest Pocket Layout & Storage Capacity
Pocket count is the number that sells vests. It's also the number that misleads more buyers than any other spec on the tag.
Here's the honest math: 10–18 total pockets covers almost every angler on the water. Ten to twelve handles most day trips with room to spare. Sixteen to eighteen suits anglers running full fly-box rotations or mixing lure types. Push past twenty, and the vest starts working against you. Too many empty pockets tempt you to overpack. Dead weight shifts with every step. Flaps overlap where you least want them.
The number matters far less than the architecture.This is also why many fishing apparel brands working with OEM/ODM fishing apparel partners spend more time refining pocket placement and access zones than increasing total pocket counts.
Front Pockets: The Engine Room
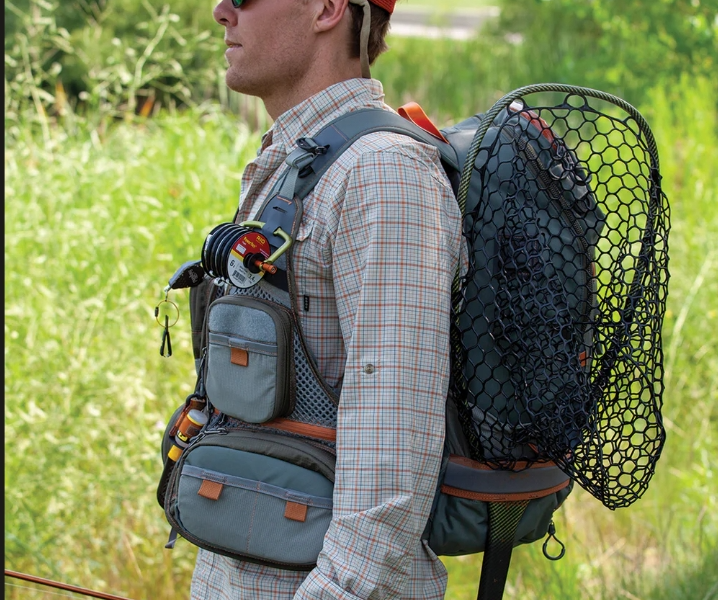
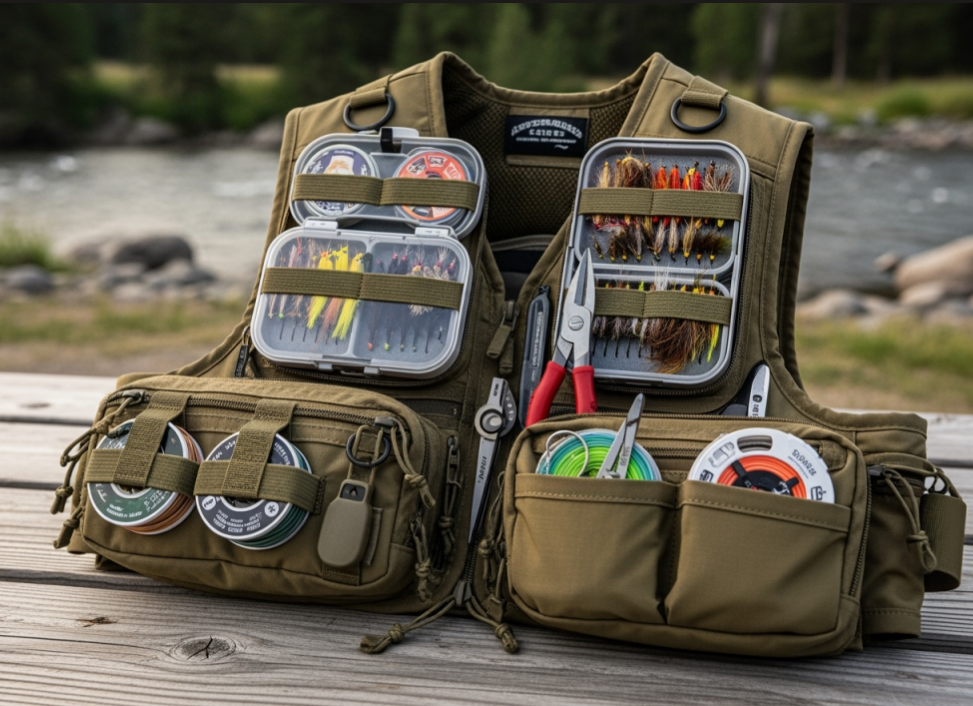
Your two large front lower pockets do the heaviest lifting on any fishing vest. Each one needs to fit a standard fly box or lure tray without the lid pushing past the panel seam. Look for an internal depth of at least 18 cm, and 20–23 cm is better . The Guideline Experience Vest gets this right: one large pocket per side, each with a 35 cm internal length and a built-in divider. It carries one large box plus a smaller backup. That's the benchmark.
Pocket orientation matters more than most buyers expect. Vertical front pockets keep weight closer to your centerline. They also cut out the horizontal shelf edge where stripped fly line loves to snag. A vest with long horizontal seams across the lower front isn't a design feature — it's a liability.
Upper Chest Pockets: The Quick-Draw Zone
Three to four small upper chest pockets — reachable with either hand, no stretching needed. That's the functional standard. One side runs floatant, dry shake, and paste. The other side carries split shot, indicators, and nippers. Tippet spools belong here too, not buried three layers deep.
The Pockets Nobody Talks About
Interior flat pockets — zippered, sitting flat against your torso — separate a well-designed vest from a glorified tackle bag. Phone, license, keys: they sit flat against the body. No forward bulk. No sagging ledge for your line to catch.
A rear zippered cargo pocket rounds out any serious layout: rain shell, a sandwich, a spare spool. Spend a full day on the water and you'll reach for it.
How to Test a Pocket Layout Before You Buy
Load your main fly box into the dominant-hand front pocket. The lid should close flat. The seam shouldn't strain. Then — and most people skip this part — try every zipper with a light glove on or with wet fingers . A pull tab too small to grip with damp hands will cost you on the water in October. You'll feel it the moment it matters.
Also pull hard on the front pocket closures. A loaded box pocket that pops open mid-wade isn't a quality control issue. It's a design failure.
Pocket Priority by Fishing Style
Fishing Style | Ideal Total Pockets | Key Layout Focus |
|---|---|---|
Stream Fly Fishing | 12–16 | 2 large front + 3–4 small chest + rear |
Lake Shore | 14–18 | 3–4 large front + multiple small upper |
Kayak Fishing | 10–14 | 2 slim front max + minimal protrusion depth |
Rock Shore | 10–12 | Fewer flat pockets, zippered closures only |
The vest that earns its place in your truck bed isn't the one with the most pockets. It's the one where every pocket has a job — and you never have to think twice about which one that is.
Breathable Mesh Ventilation & Quick-Dry Fabric Architecture
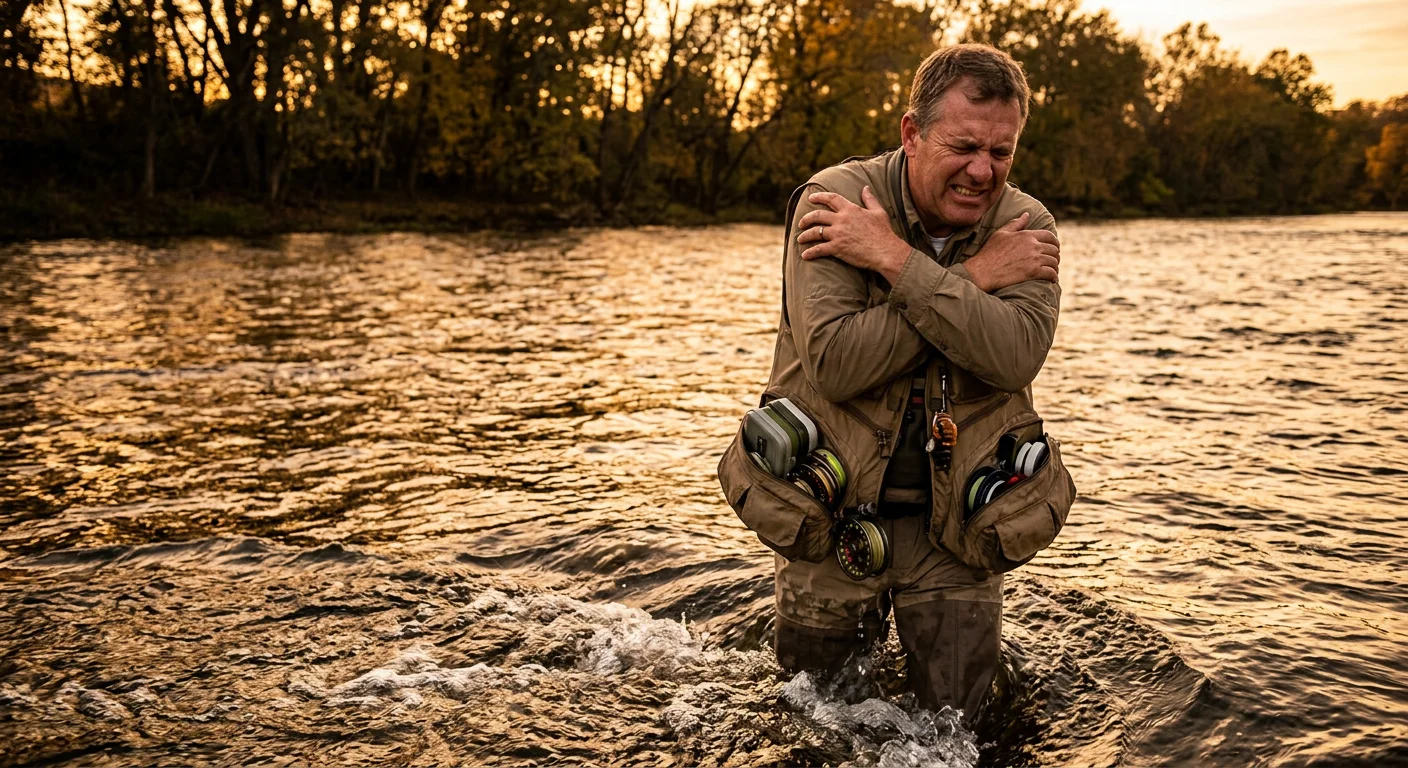
Sweat is the slow tax you pay for wearing the wrong fabric. On a long July wade, it adds up fast.
A fishing vest that traps heat isn't just uncomfortable. It's distracting. And distraction costs you fish.
The fix isn't "more mesh."An experienced fishing apparel's fabric supplier can usually identify whether a mesh panel is designed for genuine airflow performance or simply added as a visual design element. It's about where the mesh sits, how it's built, and whether it moves air or just looks like it does.
The Design That Works
The best breathable fishing vests use open-weave synthetic mesh — polyester or nylon — across the back panel and side inserts. Those are your two main heat zones. Polyester mesh resists water absorption and dries fast after a splash or a long sweaty afternoon. That pairing makes a real difference.
What to check in the construction:
Directional airflow channels woven into the mesh structure — not just holes punched through flat fabric. Engineered weave patterns pull heat and moisture vapor outward. Punched holes mostly just look like ventilation. They don't perform like it.
No blocking liner underneath. Hold the back panel up to a light source. The mesh should show even, consistent porosity across the full panel. You see a dense backing behind it? That "ventilation panel" is decoration, not function.
Vented upper-back design matters more than front mesh. Heat rises from your shoulders and core first. A vest that puts its best mesh across the back yoke earns its keep. A vest with mesh across the front chest only is a thermal trap with better marketing.
Match the Ventilation to Your Water
Not every angler needs the same level of breathability. Here's a straight priority ranking:
Fishing Style | Ventilation Priority | Best Fabric Choice |
|---|---|---|
Kayak Fishing | Critical | Full synthetic mesh back + side panels |
Rock Shore | High | Reinforced mesh inserts at key zones |
Lake Shore | Medium | Standard open-weave polyester back panel |
Stream Fly Fishing | Lower | Mesh venting useful, but secondary concern |
Kayak anglers carry the heaviest heat load — paddling, constant movement, almost no wind relief. A quick-dry mesh fabric back panel isn't optional here. It's what keeps you on the water instead of cutting the trip short.
The most common mistake buyers make: check for mesh on the front, then stop there. Flip the vest around. Back panel is solid fabric with no ventilation? Put it back on the rack.
Vest Length & Sizing Guide for Full-Range Motion
Fit a vest wrong and it will fight you all day — riding up mid-cast, jamming into your belt as you lean forward to net a fish, pulling tight across the shoulders at the worst possible moment.
Sizing a fishing vest isn't about vanity metrics. It comes down to three zones: hem length , chest volume with layering , and armhole clearance . Get all three right and the vest stops crossing your mind on the water.
Hem Length: Shorter Than You Think
Most anglers size up for comfort and end up with a hem that hangs too low. That's the wrong trade.
For casting or paddling, the front hem should end 2–3 cm above the iliac crest — the top ridge of your hip bone. This clears your wader belt and gives your torso full rotation. The front panel won't bind at the waist.
Two practical length categories worth knowing:
Short–Regular front (30–36 cm sternum to hem): Stream fly fishing, kayak fishing. The hem stays high for leg drive and forward lean.
Regular–Long front (34–43 cm): Lake shore, rock shore. More coverage is fine here. Use a drop tail on the back panel for added rear coverage — don't increase the overall front length to get it.
The drop tail design matters. A rear panel that runs 3–5 cm longer than the front gives you back coverage. The front hem stays out of the way.
Chest Sizing: Always Add the Layering Buffer
Measure your chest at its widest point — tape snug, not tight. Then stop before going straight to the size chart.
Add 2–3 inches (5–7.5 cm) to that measurement for a fleece mid-layer underneath, or for cold-water seasons. A vest sized to bare-chest measurements will bind across the upper back the moment you add a layer.
The practical math:
Chest (bare) | Add for layering | Target size |
|---|---|---|
38–40 in | +2–3 in | L (42–44 in range) |
42–44 in | +2–3 in | XL (46–48 in range) |
Your adjusted measurement lands near the top of a size range? Move up. Straps and side adjusters can take in a vest that runs a bit large. They can't fix one that's too tight across the shoulders at full extension.
Side adjusters should offer at least 4–6 cm of total expansion per side. That's enough range to shift between a base layer and a packable insulated jacket without buying a new vest.
The Armhole Problem Nobody Mentions
Tight armholes are the hidden flaw in otherwise solid vests. Fishing vest manufacturers cut them close for a clean silhouette. You pay for that decision at the end of a long backcast.
Look for ~8 cm of clearance between the armhole edge and your armpit — arm raised and rotated forward. Go for armholes that are generous and forward-angled. Shoulder and deltoid freedom beats clean lines every time.
The three-move fit test — do this before you buy:
Overhead raise: Both arms stretched straight up. The front hem should not ride past the lower ribcage.
Forward bend: Lean as if netting a fish. The back hem should clear the kidney region by at least 2 cm. Rear pockets shouldn't jam into your belt.
Rotation: Full side-to-side torso twist. No pulling across the upper chest. No binding at the shoulders. Fabric goes taut before you finish the movement? The armholes are cut too tight — size up, or pick a different pattern.
A fishing vest that passes all three tests disappears on the water. That's what you're after.
Shoulder Load-Bearing & Weight Distribution Ergonomics
Shoulder pain at 2 PM starts with a bad decision at 7 AM. You clip on a vest that hangs wrong. You load it with two pounds of tackle sitting low and forward in the hem pockets. That's where the damage begins.
Most anglers don't connect the shoulder burn with the vest design. They blame age, or the long hike in. The physics is simple, though: weight that hangs away from your body acts like a pendulum. Every step, every rock you cross — that pendulum swings. Your muscles fight it all day long.
The Load Number That Counts
Occupational load-carriage research sets a clear ceiling: keep a loaded vest at or below 15–20% of your body weight for all-day use. For a 165 lb angler, that's 25–33 lbs at the absolute limit — and pushing that ceiling is already too much. The smarter target is 10–15% of body mass . That's the range where your shoulder straps share the load instead of dumping everything onto your trapezius.
Stay in that range and your shoulders hold up through a full day. Go past it, and no strap design saves you.
Strap Width & Padding: The Spec Nobody Reads
Narrow straps focus all the pressure into one thin line across your shoulder. Straps under 3 cm wide create constant soft-tissue hot spots. They start out annoying. By early afternoon, they're flat-out painful. The minimum you want is 4 cm across the mid-shoulder zone , spreading out over the top of the shoulder to share the load across a wider area.
Padding material matters just as much. Perforated EVA or neoprene with a moisture-wicking mesh face against your skin — that's the right combination. It molds to different shoulder shapes and lets air through to stop sweat buildup under pressure. Solid foam pads trap heat and moisture. After four hours in July heat, you'll feel that difference fast.
Where the Strap Anchors Changes Everything
The anchor point — where the shoulder strap meets the back panel — controls the entire load path.
An anchor point too high, near the collar seam, sends the load straight into your cervical spine and upper trapezius. Neck tension builds. Your head drifts forward. By noon, you're rolling your shoulders every twenty minutes and you don't even know why.
The right setup: shoulder strap webbing anchors 2–5 cm below the top of the shoulder line . It curves over the shoulder into a back panel that covers the mid-thoracic region — T3 to T8. That zone is your structural load plate. Weight transfers there, not to the base of your neck.
Sternum Strap + Lower Cinch: Two Things That Truly Redistribute Weight
Ergonomic pack research shows a well-fitted hip and chest belt system can cut shoulder peak pressure by up to 50% . Fishing vests skip the hip belt — but they offer functional stand-ins.
A sternum strap pulls the shoulder straps inward and stabilizes the upper load path. It keeps the front panel from flapping as you step across gaps or wade through current. Lower side cinch straps — linking the front hem to the rear panel — lock the vest against your ribcage and stop the pendulum swing in the lower pockets.
Budget vests often skip both straps. Both are essential for rock shore fishing or heavy current.
The 10-Minute Field Test
Load the vest with 3 kg — close to a real day-load. Walk at a normal pace for ten minutes. Check four things:
Strap edges digging in → straps too narrow or padding too firm
Forward head posture or neck tension → anchor point too high, or no sternum strap
Lower panel swing → need lower cinch straps; heavy items sitting too far forward
Arm restriction during rotation → strap geometry too tight; affects casting all day
Fishing Style | Load Priority | Critical Hardware |
|---|---|---|
Rock Shore | Critical | Cross-back harness + sternum + lower cinch |
Stream Fly | High | Central mass placement + chest strap |
Lake Shore | Medium | Standard shoulder padding, basic sternum strap |
Kayak | Lower | Strap shape vs. PFD interference |
A vest that clears the ten-minute walk test with 3 kg loaded will carry you through eight hours on the water. One that shows problems in ten minutes will have you miserable by lunch.
Water-Resistant Coating & Wet-Tactile Operability

Rain hits your shoulder at 8 AM. By 8:03, it's soaked through the pocket lining and sitting against your phone.
That's not a waterproofing failure. That's a design lie. The shell repelled the rain just fine — but nobody thought past it.
What "Water-Resistant" Really Means on the Tag
The coating that matters is DWR — Durable Water Repellent. A credible DWR finish holds an AATCC 22 spray rating of ≥ 80/100 after at least five wash cycles. Below that threshold, the coating breaks down faster than your season. Water stops beading. It films. It soaks.
The test takes thirty seconds in any store. Spray the shoulder. Watch what happens.
Discrete droplets that roll off fast — DWR is working.
Water spreading and soaking into the weave — the coating is already gone, or was never good enough to start with.
Run this test on the lower front pockets too, not just the back panel. Most buyers check the obvious surfaces and stop there.
The Hidden Failure Point: Pocket Interiors
The outer shell passes the spray test. You buy the vest. First serious outing, your fly boxes are sitting in a puddle.
Here's what happens: most fishing apparel manufacturers treat the outer face fabric with DWR and leave it at that. The pocket bags underneath are plain polyester or nylon — untreated, unlined, and built to trap water right against your gear.
What separates a well-built vest:
Hydrophobic mesh pocket bottoms — water drains through rather than pooling
Grommet drainage holes in lower cargo pockets
Slick taffeta lining on valuables pockets, paired with a water-resistant zipper
Pour a small amount of water into a lower pocket before you buy. A well-designed pocket drains in seconds. One that holds a puddle will hold it all day.
Wet-Hand Operability: The Test Nobody Runs In-Store
Cold hands. Wet gloves. October. You need that fly box now.
Run this before you commit to any vest:
Wet your hands until they're dripping
Open and close every zipper — check for slippage, mis-tracking, snagging
Work every snap, toggle, and cord lock
Zipper pulls need a loop length of at least 25–30 mm , with silicone or TPU molded grips . Smooth metal tabs fail this test nearly every time — they give zero friction against wet skin. Reverse-coil or AquaGuard-style zippers on primary pockets block spray from getting inside.
The Coating Trap: Rubber vs. DWR
Heavy rubber or PVC coatings look serious on the rack. In the field, they crack under UV exposure and repeated folding — often within six to twelve months . Micro-cracks form. Water gets in through the channels the coating itself created.
Fluorocarbon-free DWR on ripstop nylon or polyester is the right choice. It's thinner, more flexible, and breathable. It keeps beading intact through repeated flexing. You can reach, cast, and wade without fighting a stiff shell on every move.
Priority by Fishing Style
Fishing Style | Water-Resistance Priority | Critical Features |
|---|---|---|
Kayak Fishing | Critical | DWR ≥ AATCC 80, draining pockets, oversized wet-grip pulls |
Stream Fly Fishing | High | Fast-drain front pockets, covered zippers on valuables |
Rock Shore | Medium | Corrosion-resistant hardware, stitched Velcro, salt-cycle seams |
Lake / Bank | Low | Standard DWR face, basic pocket drainage |
Kayak fishing sits at the top for a reason. Paddle drip and lap splash put water straight into your pocket zone. There's no avoiding it — you build around it or you get wet gear.
D-Ring Placement & Utility Attachment Matrix
Four small metal loops decide whether your vest works with you or against you.
Most anglers treat D-rings as an afterthought — something to clip a net retractor onto and forget. But placement and hardware quality do real structural work. Every cast, every wade, every reach for forceps in moving current puts stress on those rings. Get it wrong and your vest tilts left, snags your line, or drops a $40 pair of pliers into the river.
Here's the minimum that matters: four dedicated D-rings , each placed with a clear job.
One rear collar ring — landing net only. Centered, sitting low enough that the net handle clears your hat on the move.
Two front chest rings — nippers, forceps, zingers. Set just below the clavicle, spaced at least 8–10 cm apart . Closer than that, your tools swing into each other mid-cast.
One rear lower ring — wading staff, net butt, drag anchor. Positioned 5–10 cm above the vest hem so it doesn't grind against your wader top while sitting.
Serious guides run six to ten attachment points. For most anglers, four solid ones beat ten weak ones every time.
The Hardware That Holds
Ring material isn't cosmetic. Go with solid stainless steel or anodized aluminum , wire diameter ≥ 3–4 mm at net and pliers positions. A D-ring you can flex with your fingers is decorative — not structural. Treat it that way.
The webbing behind the ring matters just as much as the ring itself. Look for 20–25 mm nylon webbing stitched with a box-X or bar-tack pattern across the full webbing width. Budget vests skip this step. The stitching pulls loose under repeated shock loads — that's exactly what a net hitting current does to it.
One hardware issue worth knowing: injected plastic snap hooks fail . UV and saltwater exposure make them brittle over time. A hook gate shearing off in strong current happens fast, with no warning. No primary load point on a quality vest should rely on them.
The Load Distribution Rule Nobody Mentions
Too much weight stacked on a single vertical axis creates real problems. Picture a rear neck ring carrying your net, plus a rear lower ring carrying a heavy tackle pouch — both in the same column. That combination twists the back panel, pulls shoulder straps out of position, and puts serious stress on one stitch line.
The fix is straightforward: keep total hanging weight difference under 0.5–0.7 kg between left and right sides . Net goes on the rear center ring. Your heaviest tool cluster — pliers, knife — goes on the front side ring opposite your rod hand. Running a wading staff? Anchor it to a rear-side ring , not center rear. That way it doesn't compete with the net for the same attachment axis.
Quick Checklist Before You Buy
Test | What to Check | Pass Standard |
|---|---|---|
Lateral pull | Firm sideways pull on each ring | No fabric tear, seam creep, or ring deformation |
Resting position | Ring standoff from panel (no tools clipped) | ≤ 7 mm flush to fabric |
Retractor reach | Cord extension on chest zingers | 70–90 cm — shorter limits reach, longer tangles line |
Casting clearance | Front D-rings during arm sweep | No ring catches rod hand or line |
A vest that passes all four takes about three minutes to check in the store. Skip it, and the lesson shows up the first time your net leash parts in the middle of a run.
Integrated Rod Holder & Quick-Access Tool Loops
The rod holder stitched onto most vests is an afterthought. You can tell by the hardware — a thin plastic ring, one loop of flimsy webbing, no drainage hole at the bottom. It holds a rod until it doesn't.
Here's what the construction needs to do.
The lower collar ring needs an internal diameter of at least 60 mm. That clears most EVA and cork rod butts, including heavier inshore grips that run 25–35 mm outside diameter. Go tighter and you're fighting the holder every re-holster. With gloves on, it gets worse. The collar itself needs to be 25–38 mm reinforced nylon webbing , stitched box-X. Add an open bottom or cutout so silt and water drain out instead of pooling against your ferrules.
The upper retention band is where most vests cut corners hardest. A fixed snap or static loop forces a two-handed release. What you want is an elastic keeper band with a single-direction quick-release buckle — one pull, rod drops into your hand. That's the whole standard.
Tool loops follow the same logic. Mount them on your dominant-hand side at lower chest level. Space loops 3–4 cm apart , with at least two to three positions for forceps, nippers, and pliers. The webbing needs to be double-layer with bar-tack ends. It has to stay stiff enough to resist sideways collapse — ≥30 N extraction force is the target. Fold a loop flat with your thumb in the store, and your pliers will pop out the first time you push through streamside brush.
Quick field test: Load your heaviest rod. Clip your full tool set. Press everything hard against a door frame. Nothing should shift, rotate, or eject. Rod wobbles on a light shake? A tool rolls sideways out of its loop? That hardware won't hold up in real field conditions.
Fishing Style | Rod Holder Priority | What to Prioritize |
|---|---|---|
Lake Shore | Critical | ≥60 mm ring, drainage, fast re-deploy ≤2 sec |
Rock Shore | High | ≥30 N lateral retention, low-snag tool loops |
Kayak | Medium | Angled drain design, one-handed holstering seated |
Stream Fly | Lower | Chest tool loops over rod holder complexity |
One final thing: avoid single-piece injected plastic rings at any load-bearing position. UV exposure and repeated impact crack them — at the worst possible moment, in a spot where you can't retrieve what fell.
Conclusion
You came here confused. You're leaving with a framework.
A good fishing vest doesn't ask you to compromise — it just works. The pocket layout keeps your flies where your hands already are. The mesh breathes before you feel the heat. The D-rings hold weight without shifting. None of this is magic. It's thoughtful engineering. And now you know how to spot it.
Here's the honest truth about fishing vest pocket layout and every other feature we broke down: fishing clothing manufacturers are betting you won't look hard enough. You will now.
Before your next purchase, run any vest through all 7 dimensions. Takes five minutes. Saves you a full season of frustration.
Can't pass at least five of them? Put it back on the rack. The right vest exists — and you're no longer guessing which one it is.
Go find it.